Standing Mountain Climbers: How to Do Them Right
 11 min
You're between calls, still in work clothes, and your shoulders feel stiff from sitting. Getting down on the floor for a plank drill isn't happening, and you don't have time to change. That's exactly where standing mountain climbers can help, if you treat them as their own upright conditioning drill rather than an easier copy of the floor version.
Table of Contents
- Why Standing Mountain Climbers Deserve a Second Look
- Setting Up the Move With Proper Form
- Choosing the Right Tempo for Your Goal
- Programming Standing Mountain Climbers as Conditioning
- Staying Safe With Knees, Backs, and Balance
- Your First Week With Standing Mountain Climbers
Why Standing Mountain Climbers Deserve a Second Look
You've probably seen someone try this move in a kitchen or hotel hallway. They lean back, yank a knee up, stomp it down, and speed up until they're bouncing from foot to foot. It looks hurried, feels awkward, and leaves them wondering if the exercise did anything at all.
That messy version is why standing mountain climbers get dismissed. Most explanations only tell you to raise each knee while lifting the opposite arm, without explaining tempo, range, or duration for a goal, as noted in the gap in common mountain climber instructions. Done deliberately, though, the standing version has a clear job. It's low-impact, upright conditioning you can do in a small space, without putting weight through your wrists or shoulders.
That change in position also changes the challenge. Removing the floor support removes the sustained upper body load you'd get in a plank. In its place, you get more demand on hip flexion, balance, coordination, and cardiovascular effort. You're lifting each leg against gravity while staying tall on one planted foot, which is why wobbling is often the first sign you've sped up too soon.
Who This Suits Best
- Beginners and returners: You can start tall, supported, and slow.
- People avoiding floor work: Wrist, shoulder, or space limits don't rule you out.
- Busy professionals: You can fit a short set between tasks without a mat.
Don't expect identical core or shoulder benefits to the floor drill. That honesty is the point. Standing mountain climbers aren't a lesser version of something else. They're a practical tool for building repeatable movement, steadier balance, and short bursts of conditioning in places where floor work won't fit your day.
Setting Up the Move With Proper Form
Start smaller than you think you need to. Good form here looks quiet from the outside. Your trunk stays tall, your steps stay light, and your planted leg doesn't collapse inward each time the other knee lifts.
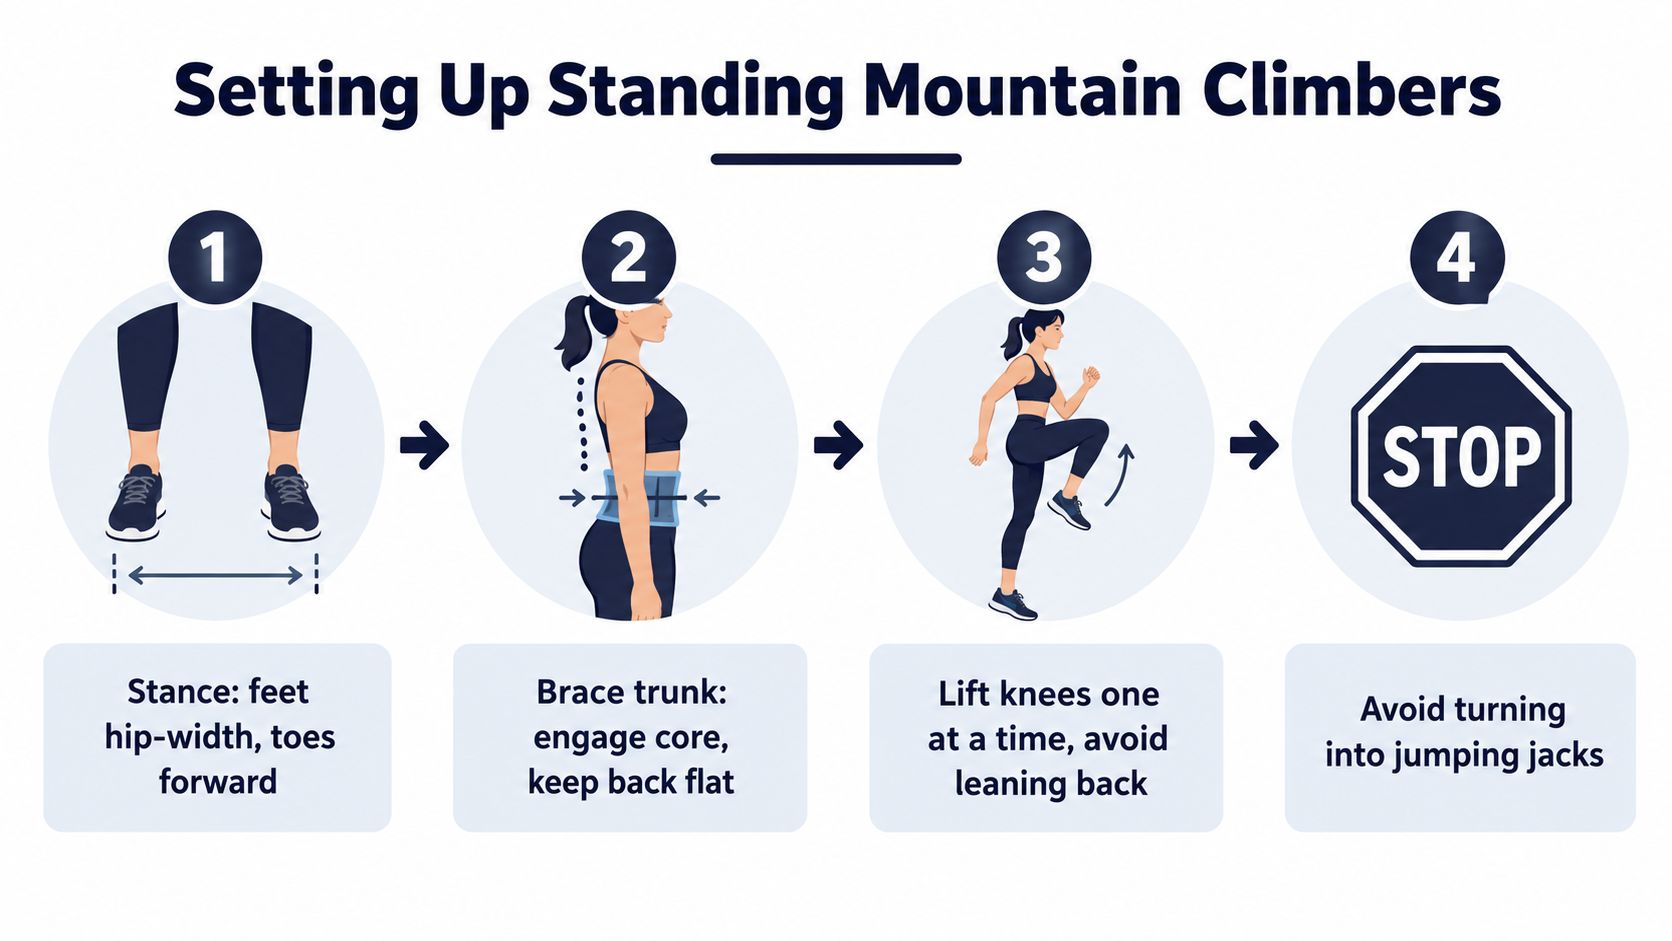
Your Step by Step Setup
- Set your stance: Stand tall with feet hip width apart and toes facing forward.
- Brace without holding your breath: Tighten your trunk as if you're about to be nudged, then keep breathing.
- Drive one knee up: Lift it toward hip height using your hip, not by leaning back.
- Swing the opposite arm: Let the arm move naturally, as it would when you march briskly.
- Place the foot down under your pelvis: Land softly, then switch sides with control.
Think of lifting the knee from the front of your hip. If you arch your lower back to create room, you've turned hip flexion into lumbar extension, and that's the fault most beginners repeat. Lower the knee a little and stay tall instead. A slightly smaller lift with a steady trunk beats a big lift that makes you sway.
The last few seconds should look like the first few. If posture, balance, or foot placement falls apart, the set has already told you to slow down.
Faults to Catch Early
- Leaning backward: You're clearing space instead of lifting the leg.
- Stomping: You're rushing the landing and losing control of the planted foot.
- Planted knee caving inward: Your balance and leg alignment need an easier tempo.
- Turning it into a jump: Both feet leave the ground and the low impact benefit disappears.
Before each set, run a quick check. Feet under you, trunk tall, breath moving, first lift slow. If you can't keep those four things, you don't need more speed. You need a steadier version that lets you repeat clean steps.
Choosing the Right Tempo for Your Goal
Tempo is the dial that changes what this exercise trains. Slow down, and you're practicing balance and controlled hip lifting. Speed up within good form, and breathing and heart rate become the bigger challenge. Neither choice is better in isolation. It depends on what you want from the set.
Climbing style movement can reach vigorous levels, as shown when recreational climbers reached 70.0% to 85.4% of relevant maximum heart rate values and 6.0 to 8.5 METs during treadmill climbing. That doesn't give you an exact heart rate for a standing set at home, because treadmill climbing is continuous and externally paced. It does show that short, climbing pattern bouts shouldn't be dismissed as only a warm up.
Matching Tempo to Goal
| Tempo | Best For | Limiting Factor |
|---|---|---|
| Slow and controlled | Warm ups, balance, learning hip lift | Single leg steadiness |
| Moderate alternating steps | Steady conditioning and coordination | Breathing control with posture |
| Faster intervals | Short vigorous bursts | Form breakdown as fatigue rises |
You'll know balance is your limiter if you start grabbing for support, hopping sideways, or planting your foot wider to stay upright. You'll know conditioning is your limiter if your steps stay tidy but your breathing forces you to stop. That distinction matters, because the fix is different. Balance limits call for slower steps or support. Breathing limits call for shorter work periods and fuller recovery.
For a different upright drill that also rewards rhythm and coordination, try practicing high knee skips for light athletic movement on a separate day. To bias standing mountain climbers toward hip flexor control, slow the lift and pause briefly at the top without leaning. To bias them toward conditioning, keep knee height consistent and add pace only while your trunk stays still. Pick one purpose before the timer starts, and you won't waste the set guessing.
Programming Standing Mountain Climbers as Conditioning
Treat this as conditioning, not an ab exercise. Floor mountain climbers combine a high plank with alternating hip flexion, recruiting trunk, shoulders, arms, and lower body. The standing version removes that plank support, so honest programming should focus on repeatable upright effort, balance, and gradual progression.
Related climbing research supports that broader framing. In a study of 10 healthy adults, muscle activity increased significantly as task difficulty rose in nearly every assessed muscle during shoulder exercises. That isn't direct evidence for this exact drill, and you shouldn't claim the same activation profile. It does support scaling climbing style movements by difficulty rather than treating them as one fixed intensity.
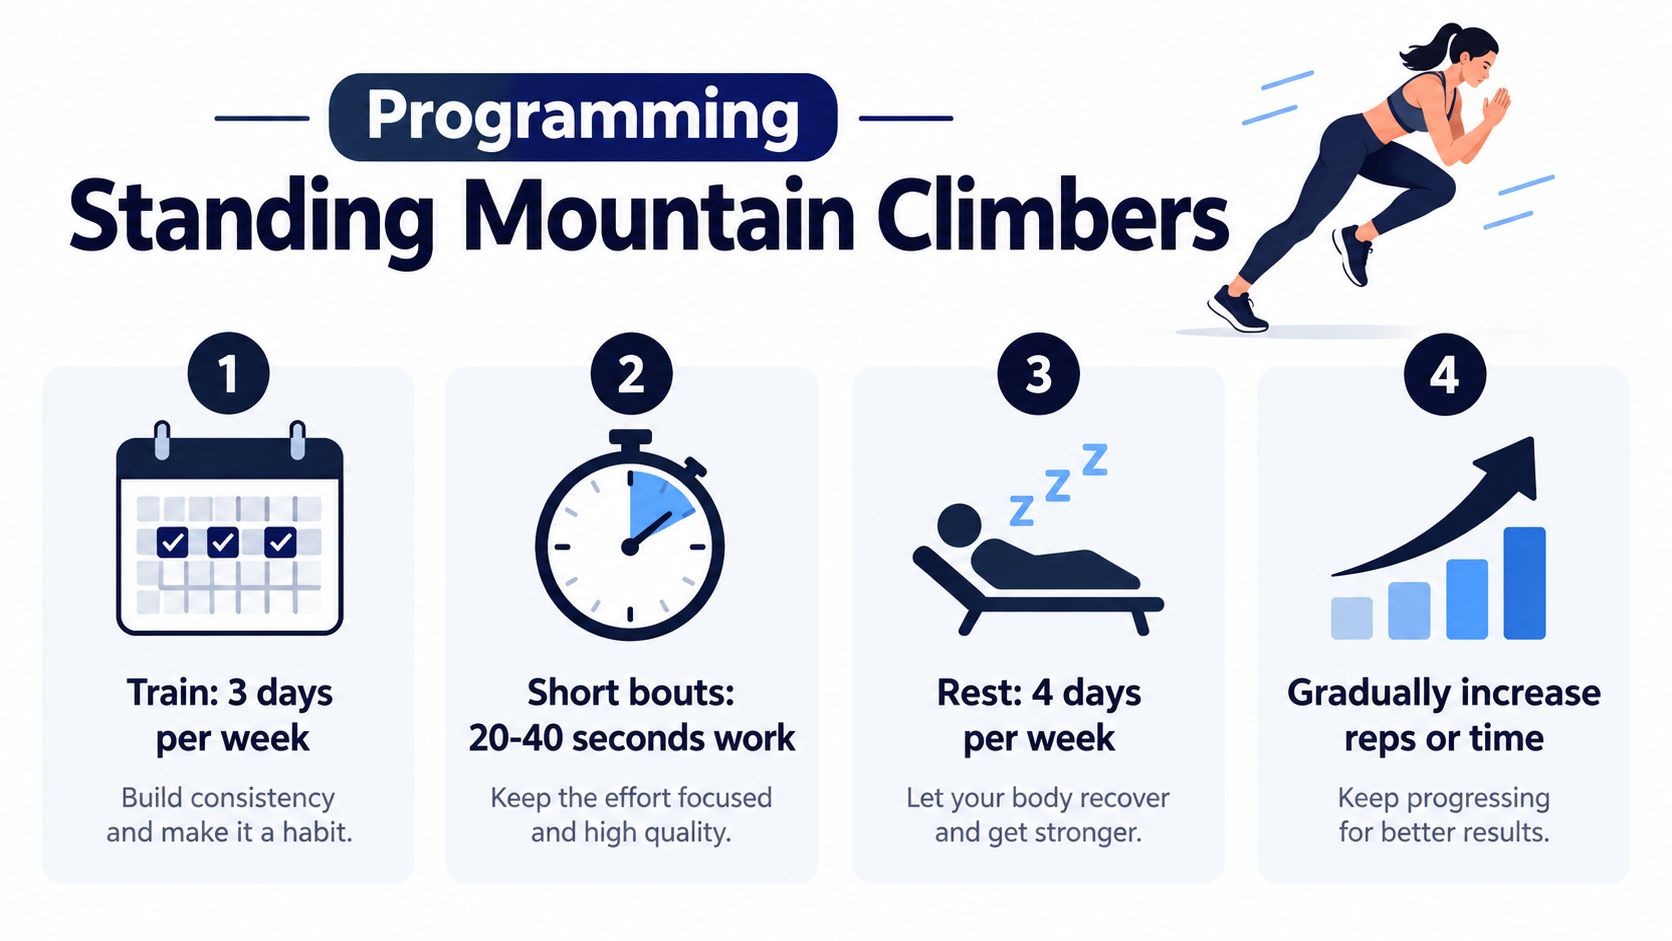
A Simple Starting Dose
- Rounds and recovery: Use 2 to 3 rounds of 20 to 30 seconds with 40 to 60 seconds of recovery, on 2 to 3 non consecutive days weekly.
- Progression order: Add repetitions or duration first, then consider speed, keeping total increases gradual.
- Quality check: Stop a round when trunk sway, knee collapse, or stomping appears.
That progression order protects you from the common trap of chasing speed on day one. Duration first teaches you to hold posture while tired. Speed last only works if your steps are already repeatable.
Slot these rounds between meetings, after a walk, or while dinner cooks. Pair them with broader strength work rather than replacing it. For example, bear crawl exercises for floor based whole body training give you the supported upper body demand that the standing version deliberately leaves out.
Programming rule: Earn speed by proving you can keep the same knee height, landing spot, and tall trunk when you're slightly out of breath.
Staying Safe With Knees, Backs, and Balance
Accessible doesn't mean risk free. Standing mountain climbers are low impact, but you're still lifting your legs repeatedly, balancing on one foot, and raising your effort. If you have knee, hip, or back pain, balance concerns, or a cardiovascular condition that isn't well controlled, start conservatively and get individual medical guidance when you're unsure.
Use a progression instead of jumping straight to fast intervals. Begin with supported marching beside a wall or sturdy chair, lifting each knee only as high as you can without leaning. Move to unsupported alternating lifts when you can stay tall and place each foot softly. Add faster intervals only after that unsupported version feels steady at a moderate pace.
Ways to Make It Easier
- Lower the knee: A smaller lift reduces hip and back compensation.
- Slow the cadence: More time on the planted leg exposes wobbles you can correct.
- Keep support nearby: Touch a chair lightly rather than grabbing it after a stumble.
- Shorten the bout: End while your form still looks clean, not after it unravels.
Stop if you feel joint pain, dizziness, chest discomfort, or unusual shortness of breath. Normal exertion can make breathing harder and muscles feel warm. Warning signs feel sharp, unsettling, or out of proportion to the effort, and they aren't something to push through for the sake of finishing a timer.
Keep expectations honest too. Short exercise bouts can support fitness, but evidence for exercise snacks does not consistently support improvements in body composition, blood pressure, or blood lipids. Don't sell this drill to yourself as a fat loss shortcut or complete strength program. Its advantage is accessibility and adherence. You can repeat a joint friendly version often enough to build a habit, and you can scale intensity to your capacity rather than copying someone else's pace.
Your First Week With Standing Mountain Climbers
Your first week should feel almost too manageable. That's intentional. You're learning positions, tempo, and recovery, not proving toughness in your first few sessions.
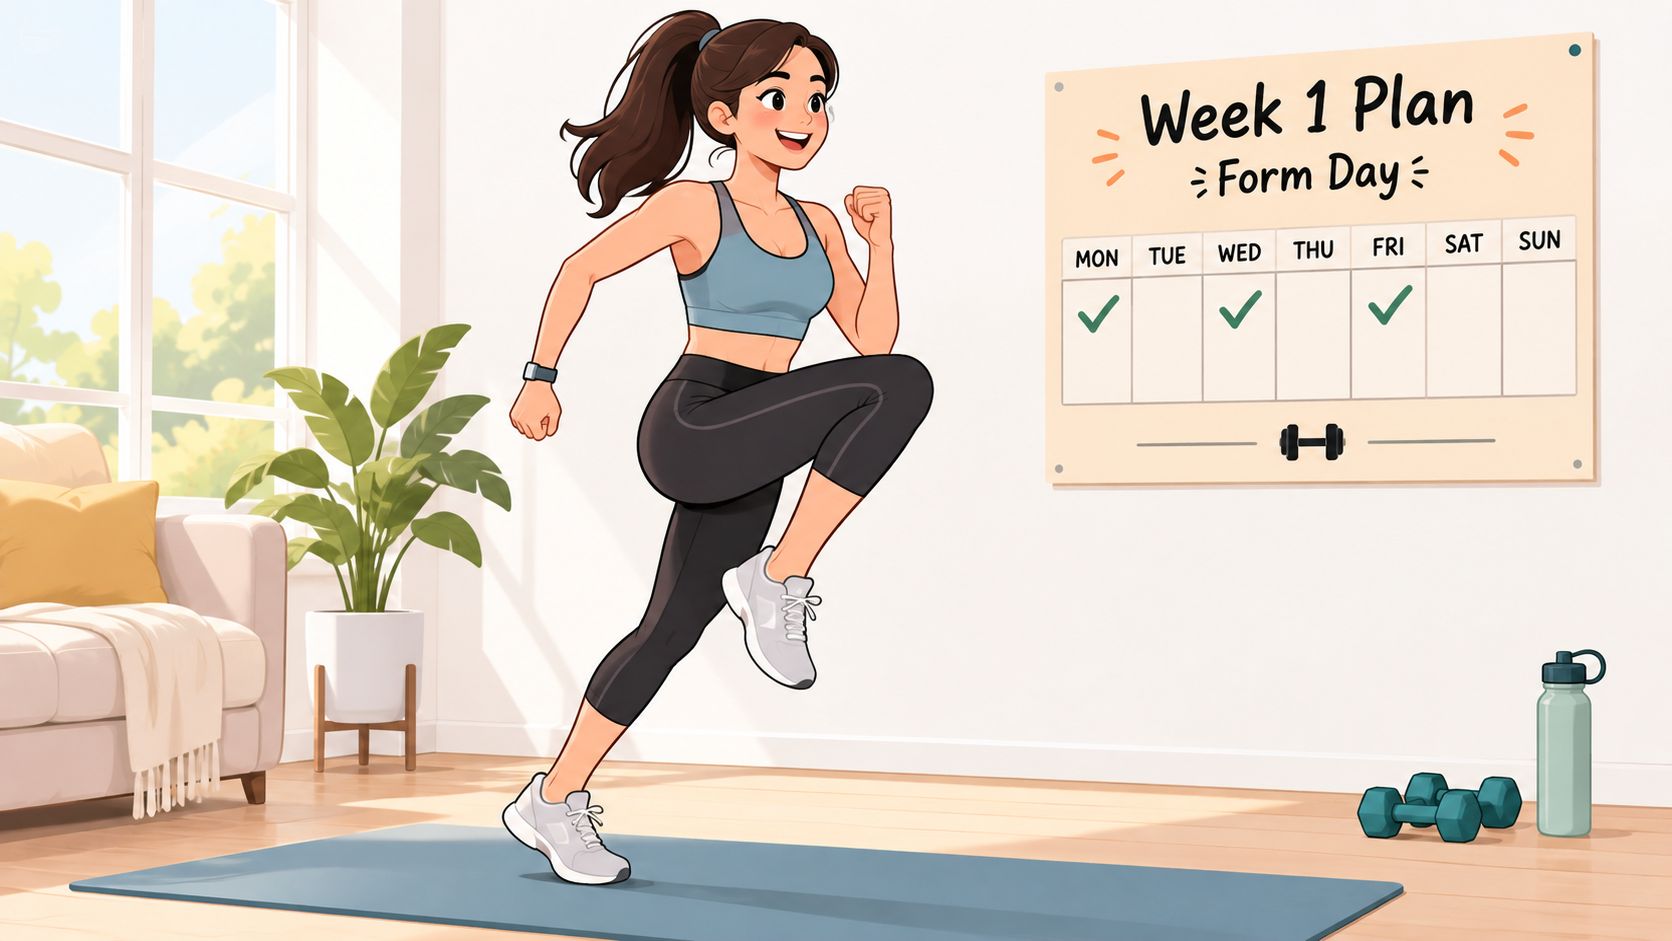
Start with a supported marching day to learn the lift without fighting for balance. Rest the next day. Use your second training day for slow, controlled alternating steps, then rest again. Finish the week with a moderate tempo day if your trunk stayed tall and your landings stayed quiet in the earlier sessions.
Watch the movement once before your moderate day, paying attention to posture rather than speed.
Log more than repetitions. Write down duration, alternating steps, whether cadence dropped, and a simple form failure flag for sway, stomping, pain, or knee collapse. That record tells you whether you're progressing or just moving faster with worse control.
If you're building a wider routine, this guide to bodyweight training for beginners can help you place this drill alongside basic strength movements. Keep rest days in the plan, repeat the same setup each time, and let consistency do the work. By the end of week one, success isn't exhaustion. It's three calm sessions you could repeat next week with slightly better control.
Turn those short standing sets into a visible habit with SuperStrong, which logs brief at home bodyweight work as tiles on a shared wall for you and up to four friends. You'll get simple training day goals without points, streaks, or complicated plans, so every clean set counts where you can see it. Start your first week and invite your group at SuperStrong.