How to Get Quick Feet with Short Home Drills
 14 min
You do not need a fancy ladder, a gym, or a full hour to get quicker feet. If you've got a laptop open, a hallway, and two spare minutes between calls, you've already got enough space to start training the thing that matters most, how your feet contact the floor, how cleanly you can stop, and how fast you can answer an unexpected cue.
The mistake many players make is treating quick feet like a single speed problem. It isn't. It's a movement-quality problem first, then a braking problem, then a decision-making problem, which is why the best short sessions are small, frequent, and brutally honest about when form starts to slip.
Table of Contents
- Why Short Sessions Can Actually Build Quick Feet
- The Three Outcomes That Make Feet Feel Quick
- Pre-Planned Foot Speed Drills You Can Run at Home
- Adding Reactive Cues Without a Coach or Gadget
- Build the Strength That Protects Quick Feet
- Your Weekly Quick-Feet Dose and Recovery Rules
- Tracking Progress and Knowing When to Move On
Why Short Sessions Can Actually Build Quick Feet
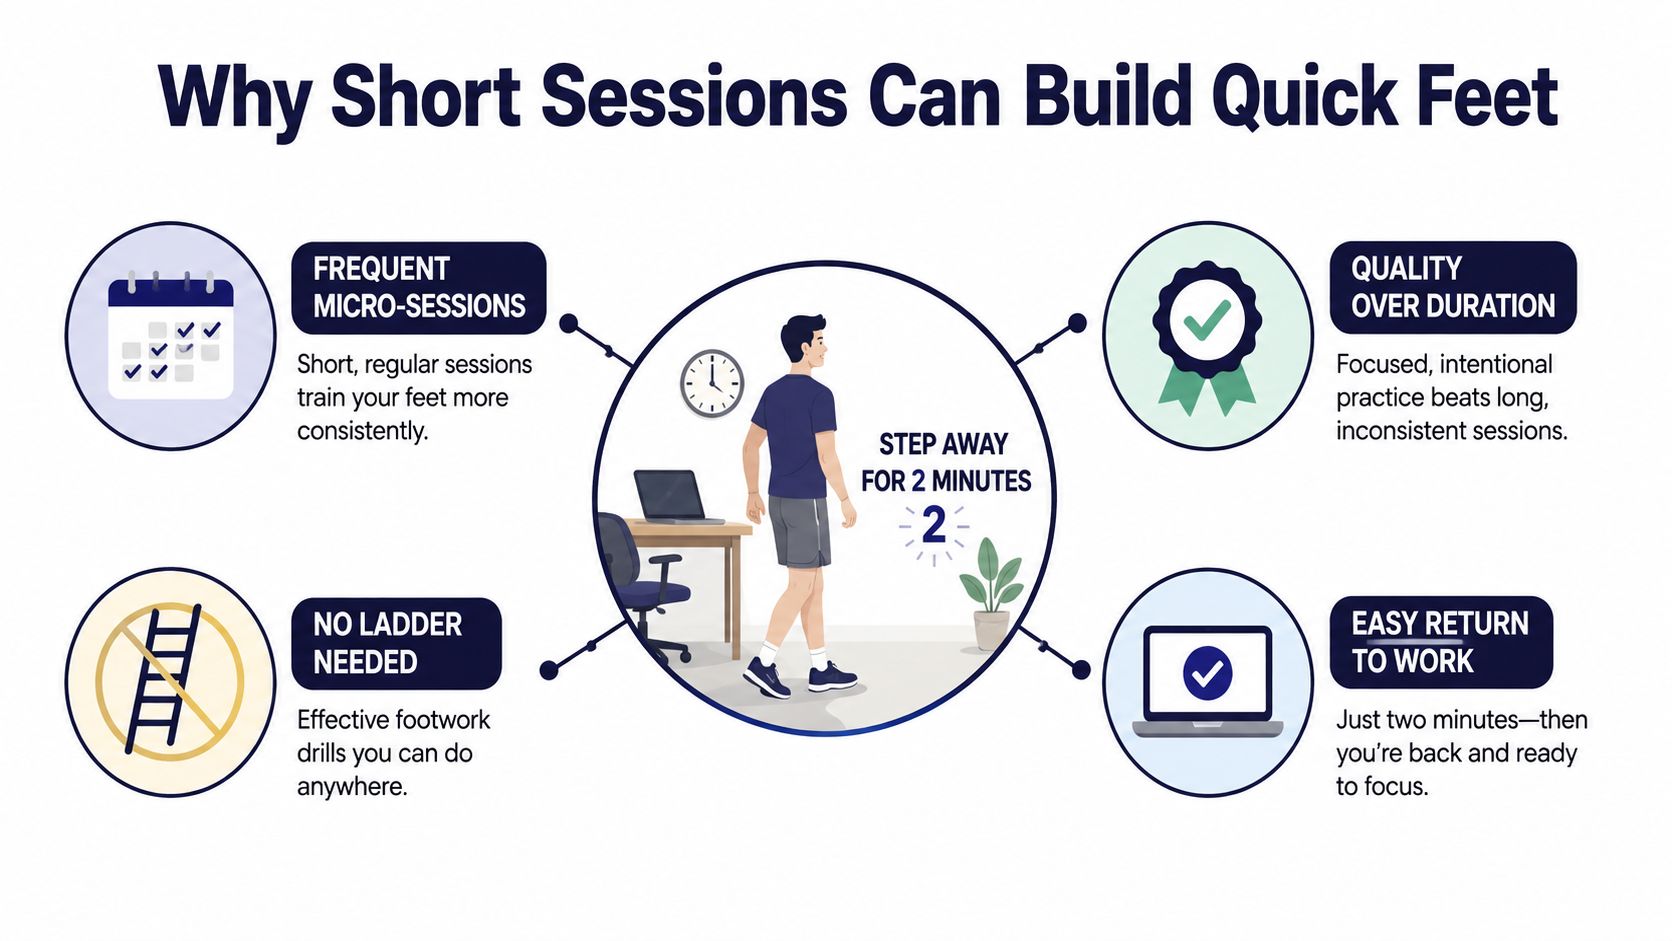
A useful starting point is the idea of exercise snacks, brief bouts of activity spread through the day. A 2025 systematic review synthesized 26 peer-reviewed studies published from 2012 through 2025, and the exercise-snack bouts in those studies generally lasted 1 to 5 minutes and were performed 2 to 8 times per day. The review also found these bouts ranged from light to vigorous effort, which supports the simple idea that quick-feet work doesn't need to be long to be worth doing. The review is useful because it shows the training structure is practical, not just motivational language.
A two-minute footwork break before the next meeting can be more realistic than a planned workout you keep postponing. The reason is simple, short bouts lower the scheduling barrier and give you repeated practice with coordination, balance, and rapid force production. For a beginner, that means a few clean contacts now, then another small dose later, instead of trying to force a big session when you're already tired.
What short sessions are really doing
The point of these mini-sessions isn't to make you gasp. It's to give your feet lots of quality touches. That's why a few fast marches, lateral steps, or quick toe taps can matter more than a long, sloppy circuit where your posture falls apart halfway through.
Practical rule: If you can fit the drill between sending one email and opening the next, you're probably more likely to repeat it often enough for it to matter.
A 2025 review of short exercise bouts, based on 11 randomized controlled trials with 414 participants, found high compliance and strong adherence to the prescribed routines, which is a big part of why this format works in real life. That review showed that people can stick with short bouts. For quick feet, consistency matters more than heroic effort on a single day.
The practical model is a layered one. First, you build clean contact speed. Then you add braking and re-acceleration. After that, you make the feet answer an unexpected cue. That sequence keeps you from mistaking busy-looking movement for useful training.
The Three Outcomes That Make Feet Feel Quick
The first outcome is foot-contact speed, which is how quickly the foot touches down and gets off the floor again. You see this in fast marching, rapid toe taps, and short line steps. It's the most visible part of quick feet, which is why people often stop here and assume they've solved the whole problem.
Foot speed is not the same as athletic quickness
The second outcome is braking and re-acceleration. That's the ability to stop without folding at the hips, twisting the knees, or losing balance, then push off again in a new direction. Think about catching yourself on a slippery floor or stepping around a chair in a crowded hallway, the feet only look quick if the body can stay organized while they move.
The third outcome is reactive agility, which is quick feet under an unpredictable cue. That could be a tossed object, a hand signal from a partner, or a verbal direction you didn't know would come next. If you only train memorized patterns, you may get sharper at choreography without getting better at real-world responding.
Quick feet that can't brake are just fast mistakes.
A lot of ladder-only routines miss this distinction. They can improve rhythm and coordination, but if every rep is preplanned, the brain isn't forced to choose. That's why a hallway shuffle, a grocery-aisle sidestep, and a cue-based reaction drill all belong to different buckets even though they may look similar from a distance.
If you want a clean filter, use this: contact speed, then deceleration, then reaction. When you know which problem you're training, the right drill becomes obvious, and the wrong one becomes easier to ignore.
Pre-Planned Foot Speed Drills You Can Run at Home
Start with drills that make the feet move fast without forcing the rest of the body to chase the movement. A wall, a strip of tape, or a doorframe is enough. The goal is crisp, light contacts, not a contest to see how many times you can flail in 20 seconds.
Here's the simplest setup I'd give a time-poor adult at home:
| Drill | Work | Rest | Sets | Cue |
|---|---|---|---|---|
| Fast toe taps over tape | 10 to 20 seconds | 60 to 90 seconds | 3 to 5 | Light contacts, tall posture |
| High-knee march in place | 10 to 20 seconds | 60 to 90 seconds | 3 to 5 | Soft knees, quick rhythm |
| Lateral step-outs | 10 to 20 seconds | 60 to 90 seconds | 3 to 5 | Stay level, don't bounce |
| Short straight-line fast feet | 10 to 20 seconds | 60 to 90 seconds | 3 to 5 | Quiet feet, upright torso |
A simple progression is to keep the drill the same and make the contacts cleaner before you make them faster. That matters because exercise-snack work is built around short bouts repeated through the day, not one exhausting block. You can do two sets before lunch and two more later if that fits your day better than doing all of them at once.
What to watch for
Stop the set when your heels start slapping the floor, your posture rises too much, or your knees get noisy and sloppy. Those are quality failures, not badges of effort. If you keep going after that point, you're training fatigue more than quickness.
Quality beats rep count. A clean 12-second set is more useful than a messy 30-second one.
For a simple reference library, see high-knee skips, which fit well as a rhythm drill before or after the foot-speed work. Keep the session short enough that you can repeat it on another day without dread.
Adding Reactive Cues Without a Coach or Gadget
Once the base pattern looks clean, add an unpredictable cue so the feet have to answer instead of just repeat. That's the shift from memorized movement to reactive agility. A phone timer, a coin, or a family member calling out “left” or “right” is enough to get started.
The easiest setup is a random beep from a metronome app or timer. Stand in your drill position, move fast until the beep, then react to the next cue by stepping left, right, forward, or back. You're teaching the body to listen and move, not just keep time.
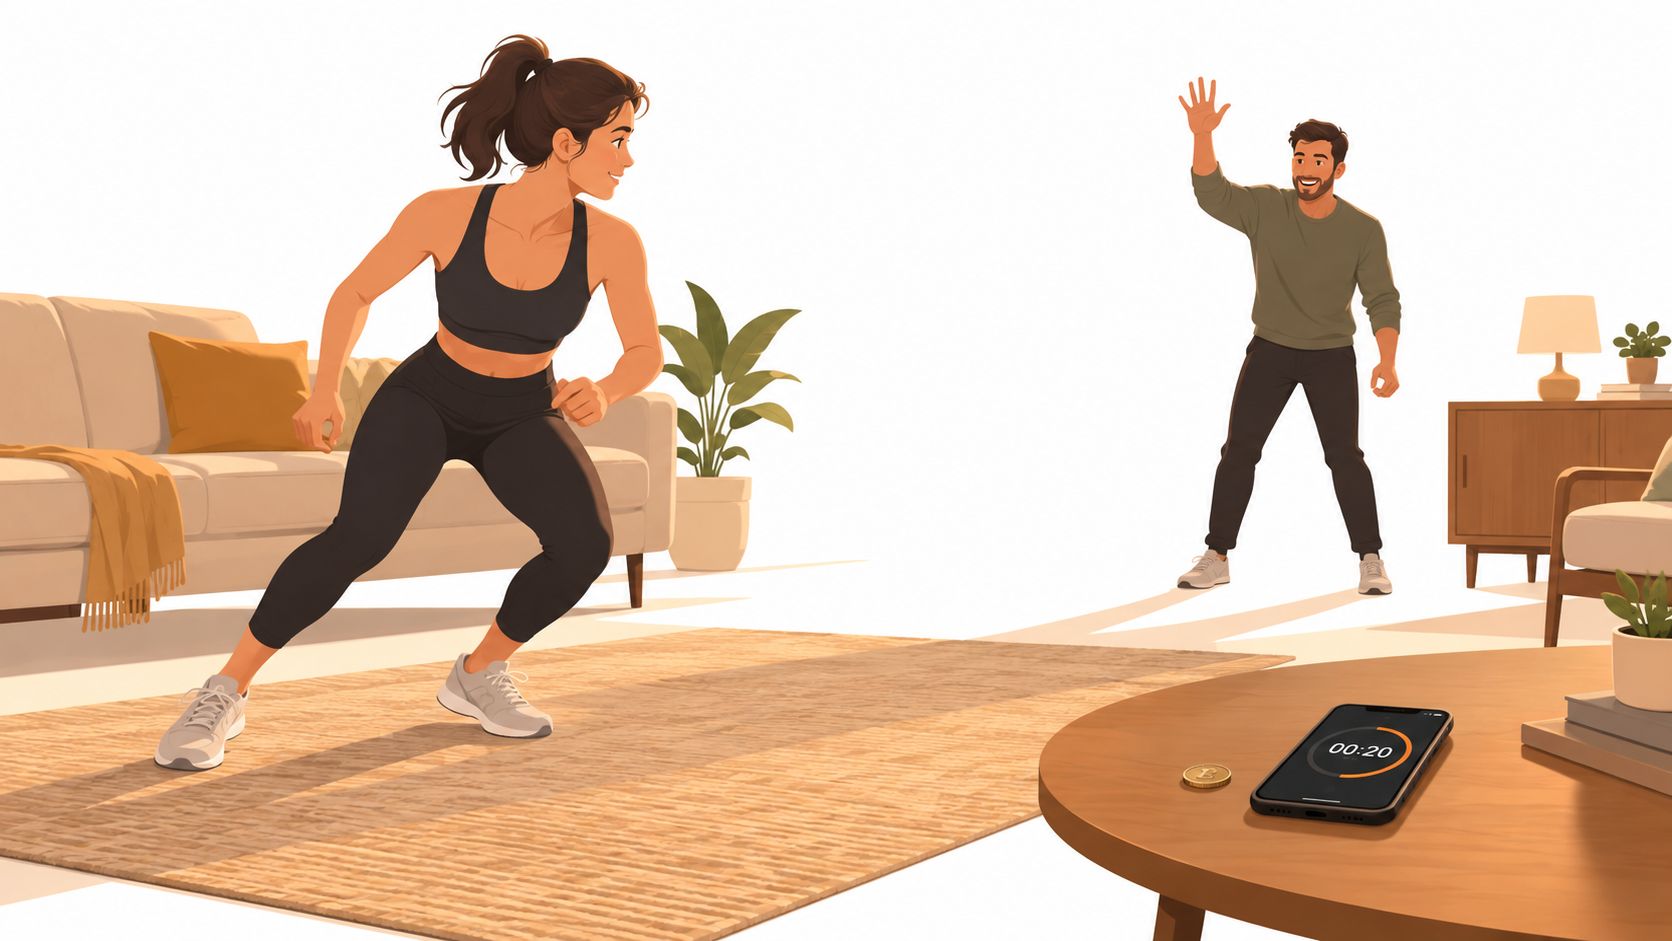
The next option is a coin flip. Heads means step left, tails means step right. A family member can make that even more useful by calling the cue late, after you've already started moving, which forces a small correction instead of a preplanned path.
A simple progression
Start with one cue and one direction change. Then add a second cue, like a color or object name, so the brain has to process a choice before the feet move. That's a better bridge to real agility than repeating a memorized pattern over and over.
Many ladder routines stall at this point. They can polish a pattern, but a pattern isn't a decision. If the drill never changes in response to an unexpected signal, it's not teaching the kind of quickness players truly need.
Midway through the session, you can watch a short example of home-based reactive movement here.
If you want the drill to stay honest, keep the cue simple and the movement clean. The goal is not chaos, it's quicker processing. As soon as your feet start missing the cue or your trunk starts twisting, the set is done.
Build the Strength That Protects Quick Feet
Fast feet get overrated when people ignore what happens the moment the body has to brake. If you can't absorb force cleanly, the speed you worked for disappears into wobble, strain, or compensation. That's why eccentric control, reactive strength, and inhibitory control belong in the same conversation as foot speed.
What to train at home
Start with snap-downs. Rise onto the balls of the feet, then drop quickly into a controlled athletic stance and freeze. The landing should be quiet, the knees should track over the toes, and the torso should stay organized.
Add split-stance braking next. Step forward or sideways into a split stance, then stop and hold the position without letting the front knee cave inward. Lateral step-and-stick works the same way, but with a side step that you have to control on landing.
For a light elastic option, use low pogo hops only when landings are quiet and the feet feel springy rather than heavy. That's the point where the lower leg starts returning force instead of collapsing through it. If the contacts get loud, shorten the range and reduce the reps.
A recent study of physically active men found practical performance markers linked with better reactive-agility performance, including eccentric hamstring strength, short drop-jump ground-contact time, and fast response on a Stroop task. The paper is worth reading if you like the logic behind braking and decision-making, but those are athlete markers, not beginner targets.
Keep the landings honest. Quiet feet, stable knees, and a tall chest tell you more than a rep count does.
A common mistake is turning strength drills into conditioning. If you rush through sets with no rest, the exercise stops protecting the movement and starts muddying it. I'd rather see a few crisp reps with a full reset than a long set where the body gets sloppy and the ankles take the bill.
For readers who want another useful body-control drill, bear crawl exercises can reinforce trunk stiffness and shoulder-to-foot coordination without adding speed chaos. Use them sparingly and keep the quality high.
Your Weekly Quick-Feet Dose and Recovery Rules
A realistic week for many is 2 to 3 sessions, each around 10 to 15 minutes. That's enough structure to improve skill without making the plan feel like another appointment you'll avoid. On each training day, start with a dynamic warm-up, then move into 3 to 5 short fast-feet sets, followed by 4 to 6 reactive repetitions, and finish with 2 to 3 strength-quality blocks.
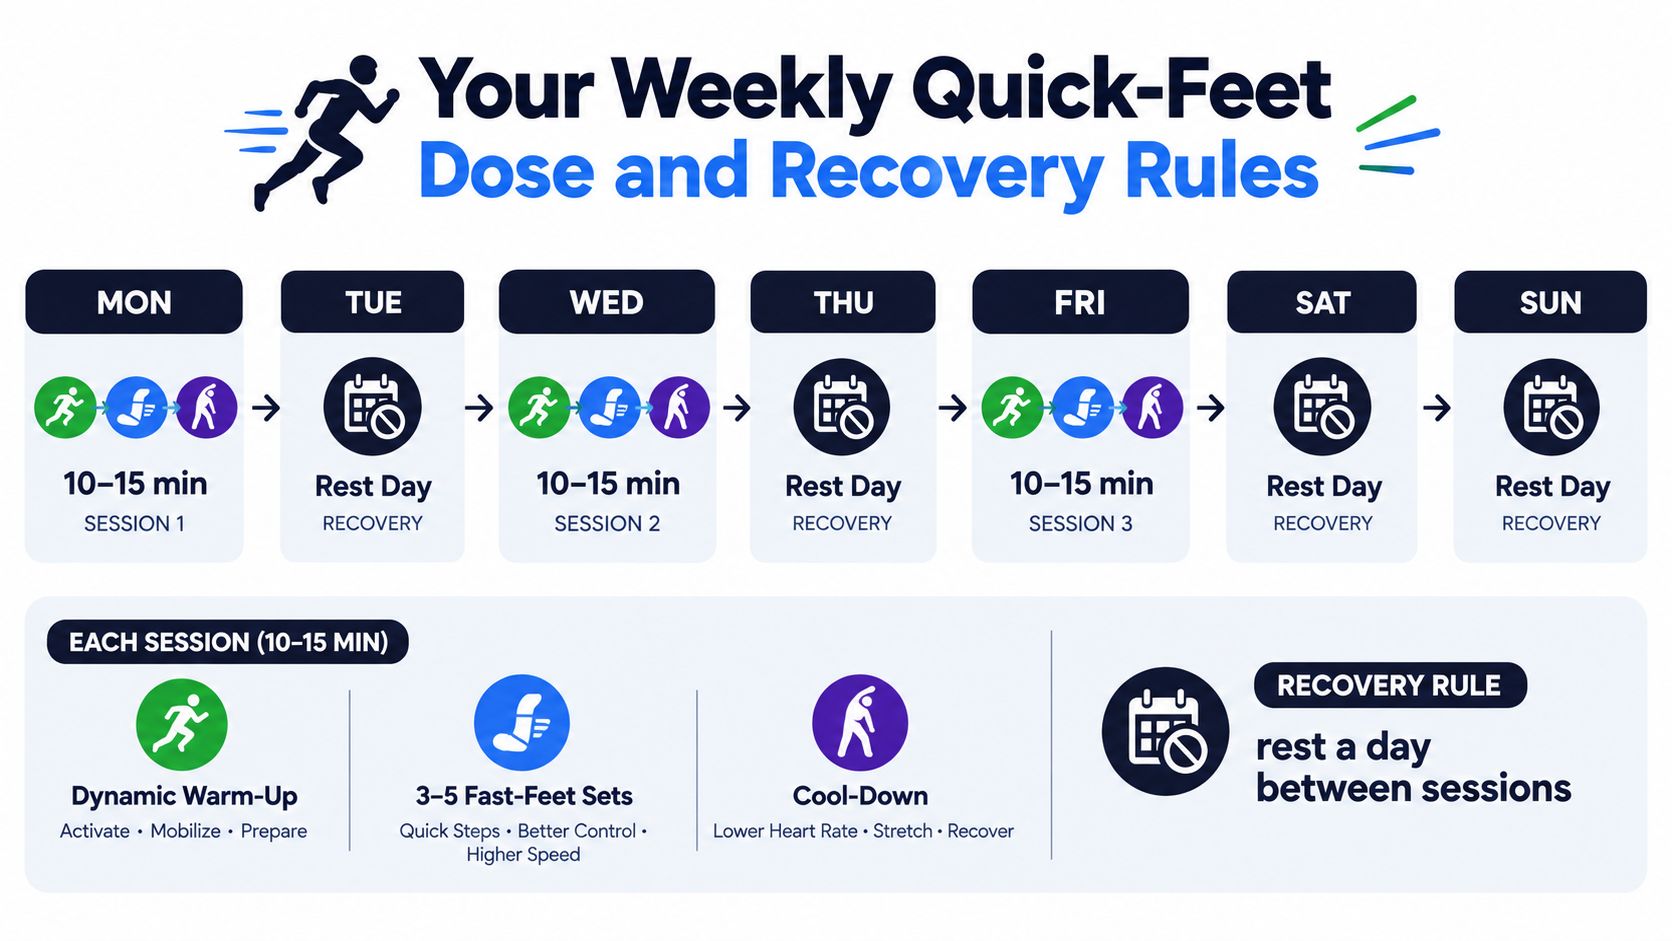
A simple weekly rhythm is Monday, Wednesday, and Friday if you tolerate impact well. If that feels like too much, start with two days and keep the sessions identical until they feel easy to recover from. The main rule is to keep a 48-hour gap between higher-impact sessions so your calves, Achilles, and feet aren't taking repeated hits without time to settle.
A clean progression ladder
Progress only one variable at a time. You can lengthen the work interval, make the contacts faster, widen the lateral range, or add more reactivity. If you change all four at once, you won't know what got harder.
The next-day check matters. If your calves feel unusually tight, your Achilles feels cranky, or your feet feel beaten up, cut impact for a day and switch to lower-amplitude marching or step-outs. That's not backing off from training, it's protecting the thing that lets you keep training.
For a related movement option that fits into a short week, step deck workouts can pair well with foot-speed days when you want simple up-and-down work without overcomplicating the session. Keep the volume modest and the rest generous.
Tracking Progress and Knowing When to Move On
The daily metric is quality, not total volume. If you see heel slaps, knee cave, mistimed contacts, or a rising posture that turns every rep into a bounce, the set is over. That's the cleanest signal that the nervous system has drifted from sharp to sloppy.
Use two simple tests every two weeks. First, time a 5-meter shuttle. Second, use a metronome app or irregular beep pattern and see whether you can change direction cleanly on cue without hesitating. Those tests tell you whether the training is improving both speed and response, not just one or the other.
How to decide whether to progress
If the work looks cleaner at the same speed, keep the current level for another week. If the contacts stay quiet and the cue work feels easy, add a little duration, a little speed, or a little reactivity, but only one change at a time. If quality drops, hold or regress.
Here's the simplest starting prescription: do two sessions this week, each with a dynamic warm-up, 3 sets of 15 seconds of fast toe taps, 4 reactive cue reps, and 2 strength blocks made of snap-downs and lateral step-and-stick. Keep the rest generous, keep the movements quiet, and choose the next progression only when the current one feels controlled.
That keeps the whole plan tied to the three outcomes. First you make the feet faster, then you teach them to brake, then you teach them to answer a cue. On any given day, if the movement gets noisy or late, the decision is simple, stay at the current level until the quality comes back.
SuperStrong fits this kind of training because it makes short bodyweight sessions easy to log, visible, and repeatable when your day is crowded. If you want a simple way to keep quick-feet work and other micro-sessions consistent at home, visit SuperStrong and see how a small daily rhythm can stick.