How to Do a Chair Squat: Steps, Form Cues and Fixes
 12 min
You've pulled a chair into the room, but you're not sure how close to stand or whether you're supposed to sit down completely. Maybe a regular squat feels wobbly. Maybe you can get down comfortably, but standing back up takes a rock and a push.
Learning how to do a chair squat starts with choosing a setup you can control. The chair gives you a clear destination, not permission to drop. Its height and the amount of hand support you use matter more than reaching a prescribed depth.
Table of Contents
- How to Do a Chair Squat Step by Step
- Who Should Chair Squat and When to Stop
- Common Mistakes and How to Correct Them
- Easier and Harder Chair Squat Versions
- Build a Realistic Chair Squat Habit This Week
How to Do a Chair Squat Step by Step
Set the chair height to match the movement you can control. A higher seat shortens the range; a lower seat asks for more hip and knee bend. Choose a stable chair that will not slide when you touch it, and clear enough space to stand comfortably.
Set up and move with control
-
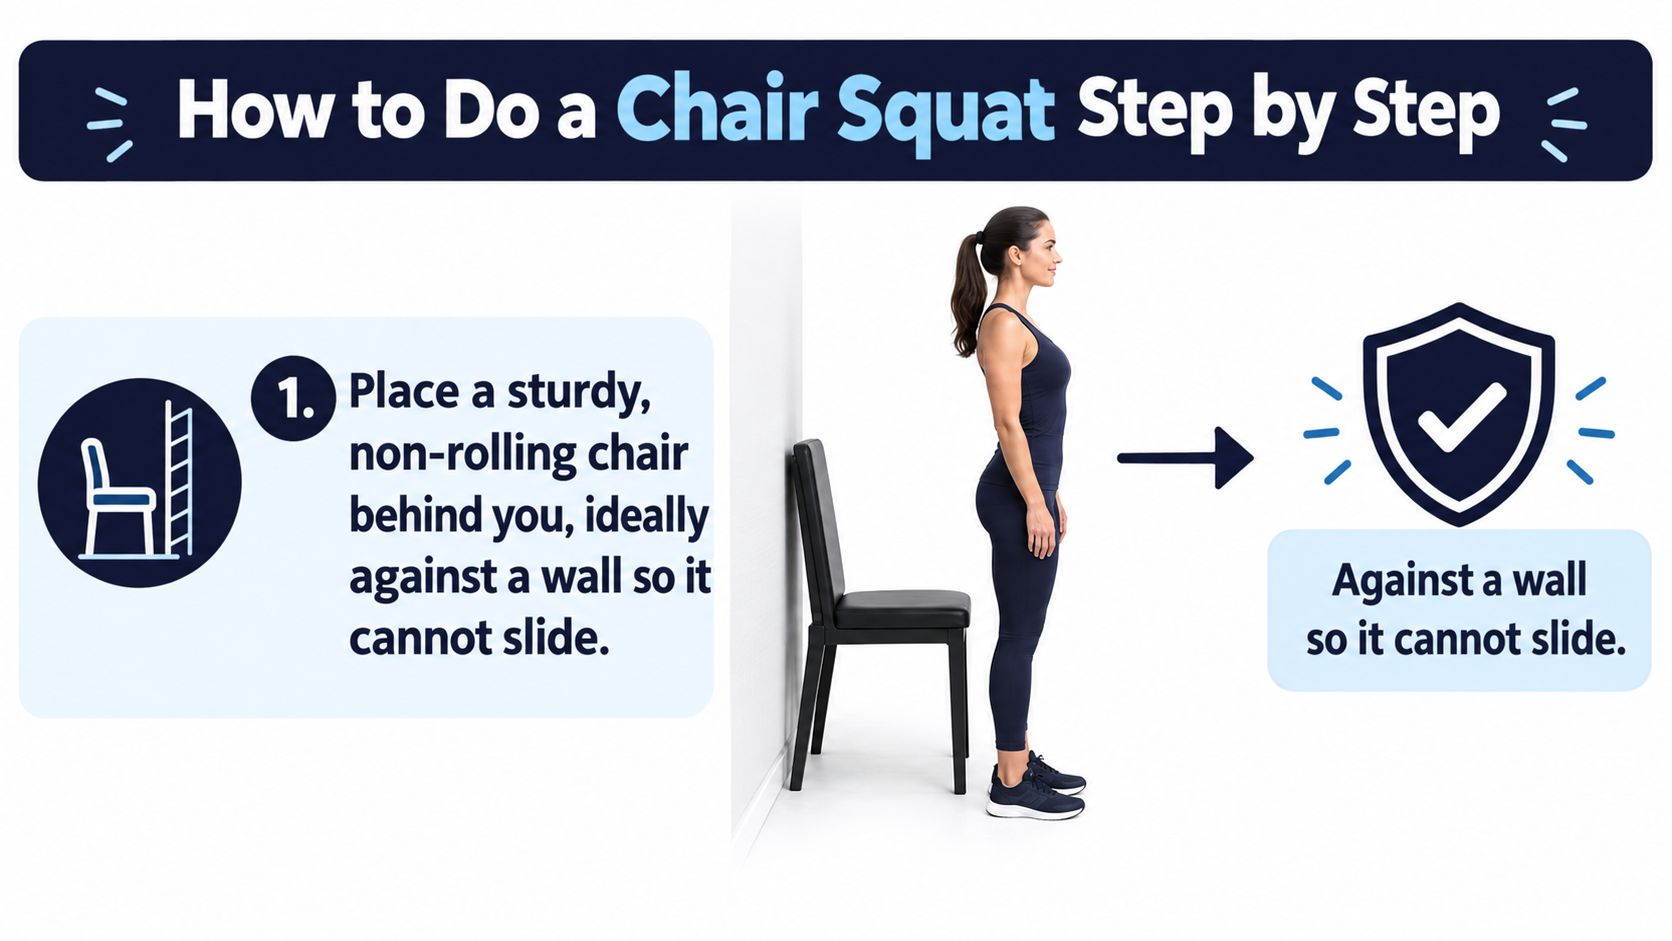
Place a sturdy, non-rolling chair behind you, ideally against a wall. Check that it stays in place. A dependable seat gives you a clear target as you lower.
-
Stand with your feet about shoulder-width apart and your toes turned slightly outward. Adjust your stance so you can reach the seat without stepping back.
-
Brace your trunk and look forward. Keep your spine neutral, without rounding your back or forcing an exaggerated arch. Let your hips and knees move while your torso stays steady.
-
Inhale and send your hips backward as if beginning to sit. Move deliberately, rather than bending your knees quickly and guessing where the chair is.
-
Bend your knees in line with your toes. Keep your whole foot planted, and watch for your knees to fall inward.
-
Lower slowly until your glutes lightly touch the chair. Stay engaged as you make contact. Don't drop onto the seat or use it to bounce back up.
-
Exhale and press through your heels and mid-foot to stand. A slight forward lean is normal. Straighten your hips and knees together, without throwing your shoulders backward.
-
Reset before another repetition. If your feet have shifted or you need to rock forward to stand, pause and adjust your position.
The form cues align with Cleveland Clinic's guidance on proper squat form. The right number of repetitions and the time spent at the bottom vary by person, so use a range and pace you can control.
What a good repetition feels like
Lower smoothly and know when the chair is close. Light contact should mark the bottom of the movement, with no surprise drop or bounce.
Don't force your thighs parallel to the floor. Use a depth you can reach with control. If you have to drop quickly to touch the seat, raise the chair or use more hand support.
Quality check: A controlled repetition includes a steady descent, light chair contact, and a return to standing without hand assistance.
If you need your hands, place them on your thighs or a stable support and use them deliberately. That changes the difficulty and can help you practise the movement with control. Adjust chair height and support to fit your body, rather than forcing a fixed depth or repetition target.
Who Should Chair Squat and When to Stop
You push yourself out of a low sofa or car seat and your knees complain. It's tempting to assume you just need stronger legs and should practise that exact depth repeatedly. A better starting point is a seat you can rise from comfortably.
Chair squats can suit complete beginners, people returning after a break, and anyone who feels uncertain about an unsupported squat. They're also a practical option for older adults practising chair transfers or busy people fitting a short set between tasks. Suitability still depends on your symptoms and balance, not just on belonging to one of those groups.
Check your starting point
Pause before starting if you have sharp knee or hip pain, recent surgery, unexplained dizziness, or instructions from your clinician to limit loading. Get individual advice rather than using a general exercise guide to override those restrictions.
During a repetition, use clear stopping rules:
- Sharp or sudden pain: Stop the movement. Don't keep testing the painful position.
- Dizziness: End the set and get yourself safely supported.
- Loss of balance: Stop rather than trying to save the repetition.
- Uncontrolled lowering: End the attempt and change the setup before continuing.
For a dull ache, don't interpret discomfort as something you must work through. Try a higher seat, make the descent more deliberate, and shorten the range. If those changes don't make the movement comfortable, choose something else and seek advice if symptoms persist.
When support is the right version
For reduced balance, frailty, or fear of falling, use a stable chair against a wall and keep your hands on its armrests or a nearby countertop. Practise a controlled sit-to-stand rather than repeatedly dropping into the seat. Full sitting is acceptable in this supported practice, provided you remain deliberate and don't launch yourself upward.
A 28-day home exercise-snacking pilot in community-dwelling older adults included sit-to-stands and reported improved five-times-sit-to-stand and timed-up-and-go performance. Participants were instructed to exercise only when another person was present who could summon help.
Use that same precaution if you feel unsteady. A chair behind you doesn't remove every fall risk.
Don't assume every exercise involving household furniture has the same setup requirements. If you're considering other movements, check the separate guidance on chair step-ups rather than transferring this setup automatically. Persistent pain or recurring dizziness warrants assessment by a clinician.
Common Mistakes and How to Correct Them
Knees drifting inward are an alignment fault worth watching for. But don't diagnose yourself with weak hips just because you notice it. Your stance, chosen depth, or difficulty level may need adjusting.
Use the table as a practical diagnostic, not a medical diagnosis. Find what you notice, consider the possible cause, and test the smallest useful change.
Chair squat faults, causes and fixes
| Symptom | Likely cause | Fix |
|---|---|---|
| Knees caving inward | Difficulty controlling alignment, or feet positioned too narrowly | Widen your stance slightly and guide your knees in the direction of your toes. |
| Heels lifting off the floor | Weight shifting toward the toes | Send your hips back and keep the whole foot planted. |
| Dropping onto the chair | The lowering demand exceeds your current control | Slow down and aim for light contact. Raise the seat if you still drop. |
| Rocking or bouncing off the seat | Relying on momentum to stand | Settle the movement briefly without relaxing, then exhale and stand without rocking. |
| Rounded upper back | Losing your brace during the descent | Reset your trunk before continuing and keep your chest comfortably lifted. |
| Rising straight up with chest upright | Trying to stand without moving your weight forward | Lean your torso slightly forward, keep your feet planted, and extend your hips and knees together. |
| Knee or hip ache during the rep | Depth or demand beyond current tolerance | Raise the seat, reduce the range, and stop if the ache persists. |
Cleveland Clinic's squat safety guidance specifically cautions against momentum and bouncing, and recommends a chair, countertop, or railing when balance makes squatting difficult.
Check the movement, not just the feeling
A short phone video can help you compare what you intended with what happened. A side view is useful for seeing a drop onto the seat or an exaggerated rocking motion; a front view is more useful for checking knee alignment.
Set the phone somewhere stable before starting. Don't turn your head to watch the screen while squatting.
Change one thing, then check whether the next repetition improves.
Trying to correct your stance, breathing, back position, and tempo simultaneously can make the movement harder to assess. Start with the fault that prevents control.
If a correction repeatedly fails, make the exercise easier rather than pushing harder. A higher seat or additional support is the sensible next move. Lowering the seat would increase the demand you're already struggling to manage.
Easier and Harder Chair Squat Versions
Chair height and hand support are your main difficulty controls. A higher seat reduces the required knee and hip range. A lower seat asks for more strength and mobility, even when everything else looks identical.
That's why matching someone else's chair isn't a useful goal. Choose the setup that lets you perform the movement well, then change it gradually.
Choose a version you can repeat
| Level | Seat height | Hand support | Starting target |
|---|---|---|---|
| Supported | Higher stable seat or securely positioned firm cushion | Hands on armrests or a nearby countertop | An easy set with consistent assistance and controlled lowering |
| Standard | A height you can reach with light contact | Fingertips initially, then none | Repeatable repetitions without dropping or rocking |
| Challenge | Modestly lower seat, without a cushion | No hands | Maintain the same quality at the increased depth before adding more work |
The repetition benchmark given earlier can remain a reference, but none of these levels requires a fixed count. Supported work isn't inferior practice. It's the appropriate version when hand assistance lets you move deliberately instead of struggling.
A small motion-capture study of chair-squat mechanics used seat heights set at 80–85% of participants' shank length in a 20-person sample. That illustrates why seat height deserves attention, but it doesn't establish a universal home setup or clinical pass/fail standard.
You don't need to measure your lower leg to begin. You need a stable arrangement that suits your current ability.
Progress without changing everything
Reduce hand assistance first. Move from a firm push through the armrests toward lighter contact, then try standing without your hands when that feels secure.
After that, lower the seat modestly. Add repetitions only after the new setup remains comfortable and repeatable. Changing support, depth, and volume together makes it difficult to identify which change caused a problem.
Regress immediately if you become shaky. Return to a higher stable chair or use fingertip assistance rather than trying to prove you can finish the set unaided.
For a wider home routine, use the same approach when choosing exercises from bodyweight training for beginners. Start with a manageable variation and earn the harder version through control.
Readiness means pain-free movement, stable knee tracking, and repeatable technique. Move up only after your current version feels consistently controlled across repeated sessions, not because the calendar says it's time.
Build a Realistic Chair Squat Habit This Week
Short exercise bouts can be useful, but the optimal chair-squat dose isn't established. Don't confuse a routine that fits your day with a prescription proven to produce a particular result.
A 2026 review of exercise snacks describes widely varied protocols, including roughly 20-second stair bouts, 15 bodyweight squats, and two minutes of walking every 30 minutes. It reports promising findings for selected fitness and physical-function outcomes, while highlighting heterogeneous studies and the need for larger samples, standardized dosing, and longer follow-up.
Those protocols aren't interchangeable instructions for chair squats. They also don't justify promising weight loss or treating a few repetitions as a complete activity plan.
Try a manageable starting experiment
- Choose a natural cue: Practise after finishing a call, before a household task, or during another convenient transition.
- Keep the set easy: Use support if needed and stop while you could still perform more clean repetitions.
- Record the experience: Note your setup, completed work, and how hard it felt.
- Check recovery: Add work only when technique stays controlled and you feel comfortable afterward.
If you like the structure of a beginner squat challenge, keep your own quality standards ahead of any accumulating target. Knee or hip symptoms mean returning to the stop rules, not chasing the tally.
This week, aim to make the movement familiar and the setup repeatable. A smoother chair transfer is a more useful immediate goal than exhausting yourself.
Controlled reps beat more reps.
SuperStrong is an iPhone app that organizes short, at-home bodyweight sets into a shared visual wall with friends. Visit SuperStrong to record your squat sets and make consistent practice visible, while keeping control and comfort ahead of a bigger repetition total.