Home Dip Bars: How to Choose and Use Them Safely
 18 min
You've got two dining chairs pulled together, your feet are propped on the sofa, and ten dips in, your shoulders feel fine on the right and pinched on the left. You log ten reps and move on, but that number tells you almost nothing about what your joints did. The setup, the depth, the help from your feet, and whether the frame wobbled all change the load.
That's the problem with home dip bars. They're simple, cheap to own, and easy to misuse because the same rep count can hide very different shoulder demands. I would judge any dip setup by fit, stability, and pain free control first, and only then by how many reps you can squeeze out.
Table of Contents
- Specs That Decide Stability, Fit and Load
- Which Home Dip Setup Fits Your Space and Shoulders
- How Dip Bars Load Your Shoulders
- How to Set Up and Perform a Safe Dip
- When Chair Dips and Push-Ups Are the Better Choice
- Logging Short Dip Sets Without Overstating Results
- Confirm Your Setup and Start This Week
Specs That Decide Stability, Fit and Load
A dip bar isn't useful because it's tall or black or folds flat. It's useful if its geometry puts your hands where your shoulders can work and its base stays still while you move. Start with the numbers, then test the frame with your own weight before you trust a rating.
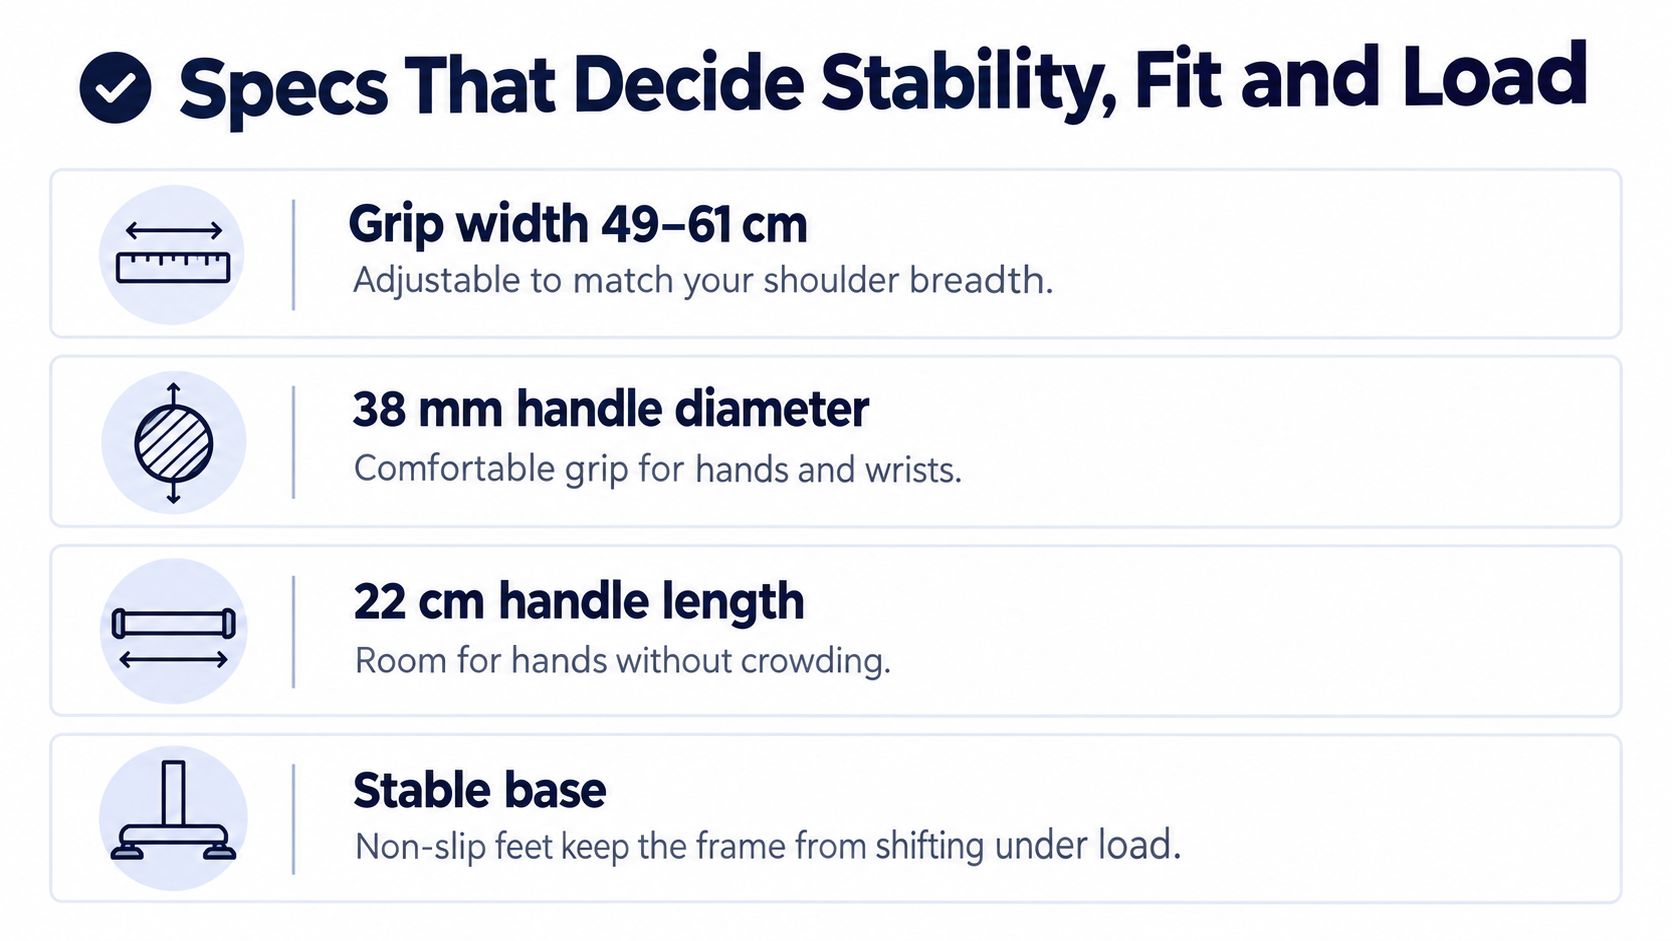
The checklist below covers the fit points to verify on the floor.
What Each Number Changes for You
One representative system on the Pullup and Dip home essentials product page specifies 49–61 cm of adjustable grip width, a 38 mm handle diameter, a 22 cm handle length, an assembled footprint of about 68 × 40 × 100 cm, and a 110 kg maximum user load. Width matters most. If the bars force your hands well inside or outside your shoulder breadth, your upper arms get pushed into awkward inward rotation before you've even bent your elbows.
A 38 mm handle is on the thick side. You'll grip harder to stay locked on, which tires forearms sooner, but many people find the pressure spreads better across the palm than a thin tube that digs in. Handle length gives you room to set a neutral wrist without crowding the uprights, and footprint tells you whether you'll clear the skirting board, the rug edge, and the ceiling when you press to full height.
| Specification | Representative value | What it changes |
|---|---|---|
| Grip width | 49–61 cm, adjustable | Fits shoulder breadth and reduces forced internal rotation |
| Handle diameter | 38 mm | Thicker grip raises grip demand; some users find it more comfortable |
| Handle length | 22 cm | Hand room for a neutral grip |
| Assembled footprint | About 68 × 40 × 100 cm | Floor space and ceiling height needed |
| Maximum user load | 110 kg | Rated limit; not proof of stability during fast reps |
| Base and feet | Wide, non slip feet on level floor | Grip on the floor; prevents sliding and frame movement |
Why a Load Rating Is Not a Stability Guarantee
Dipping isn't static. You swing a little, you push harder through one hand, you shift as you fatigue, and those side to side moments try to tip or walk the frame. A 110 kg ceiling doesn't prove the bars will stay planted during fast, uneven reps. Treat the rating as a limit you shouldn't approach casually, especially once you add a belt or vest.
Practical rule: If the frame rocks when you lean hard on one bar, it will move more when you're tired. Fix the floor or the frame first.
Run this check before your first set, every time you move the bars.
- Level floor: Set the feet on hard, non slip ground, not a thick rug or sloping boards.
- One bar push test: Press down and sideways on a single bar. You shouldn't see lift, slide, or twist.
- Width match: Set grip width close to your shoulder breadth so your forearms stay roughly vertical at the top.
- Progressive loading: Start with supported bodyweight reps, then full bodyweight, then added load only after clean sessions.
If any check fails, that's a no go for that day. Adjust the surface, tighten the hardware, narrow the width, or pick a different exercise. A stable, well fitted bar lets you judge your shoulders accurately. A wobbly one makes every rep a balance test you didn't sign up for.
Which Home Dip Setup Fits Your Space and Shoulders
Choosing a dip setup means balancing shoulder range against stability, space, and control. A rep count alone cannot show how demanding a set was: the same ten dips can load the shoulders differently depending on the setup, depth, and assistance. Log those details with your reps.
The Griffith University biomechanical comparison reports mean shoulder extension of 88.13° ± 8.86° for bench dips, 78.20° ± 9.84° for bar dips, and 61.72° ± 13.51° for ring dips. Greater extension means the upper arm travels farther behind the body at the bottom. The study's bar-dip average should not be treated as a measurement for parallel bars.
| Setup | Mean shoulder extension | Stability | Space and set-up | Best fit |
|---|---|---|---|---|
| Bar dips (study average) | 78.20° ± 9.84° | Depends on the bar and its support | Depends on the equipment | Reference point for the study, not a parallel-bar measurement |
| V-bar | No comparable mean in this comparison | High if frame is fixed and level | Fixed angled frame, similar floor footprint | Low-rep bodyweight practice while fresh |
| Ring dips | 61.72° ± 13.51° | Low; hands move, high skill demand | Overhead anchor and extra ceiling clearance | Experienced users with strong shoulder control |
| Bench or chair dips | 88.13° ± 8.86° | Depends on the chair; it can slide | Chair or bench edge only | Use cautiously, and avoid treating it as an easier substitute |
How to Read the Numbers Without Fooling Yourself
Bench dips had the highest mean extension in this comparison. With hands fixed behind you and legs forward, the shoulder travels back as you lower. Depth and fatigue can make that position harder to control.
Ring dips had the lowest mean, but the spread was wider. The ± 13.51° indicates substantial variation in the measured positions. A lower average does not make rings automatically easier: controlling hand movement and keeping the rings close requires skill.
The study gives no comparable mean for the V-bar, so use fit and control rather than assigning it a number. Start with low-rep bodyweight sets while fresh. Check that the angled grip lets your elbows track comfortably, and end the set before your range becomes difficult to control.
For your home setup, match the equipment to the room and your current control:
- Choose parallel bars when you have a level floor and room for a freestanding frame. Their stability and fit depend on the actual frame and setup, not the study's bar-dip average.
- Choose rings only if you can control support holds and slow negatives without shaking.
- Use a chair cautiously, rather than as a beginner shortcut, and keep the range comfortable.
Keep the setup consistent while comparing sessions. Log the equipment, depth, assistance, and reps together, so a set of ten has enough context to show what you really did.
How Dip Bars Load Your Shoulders
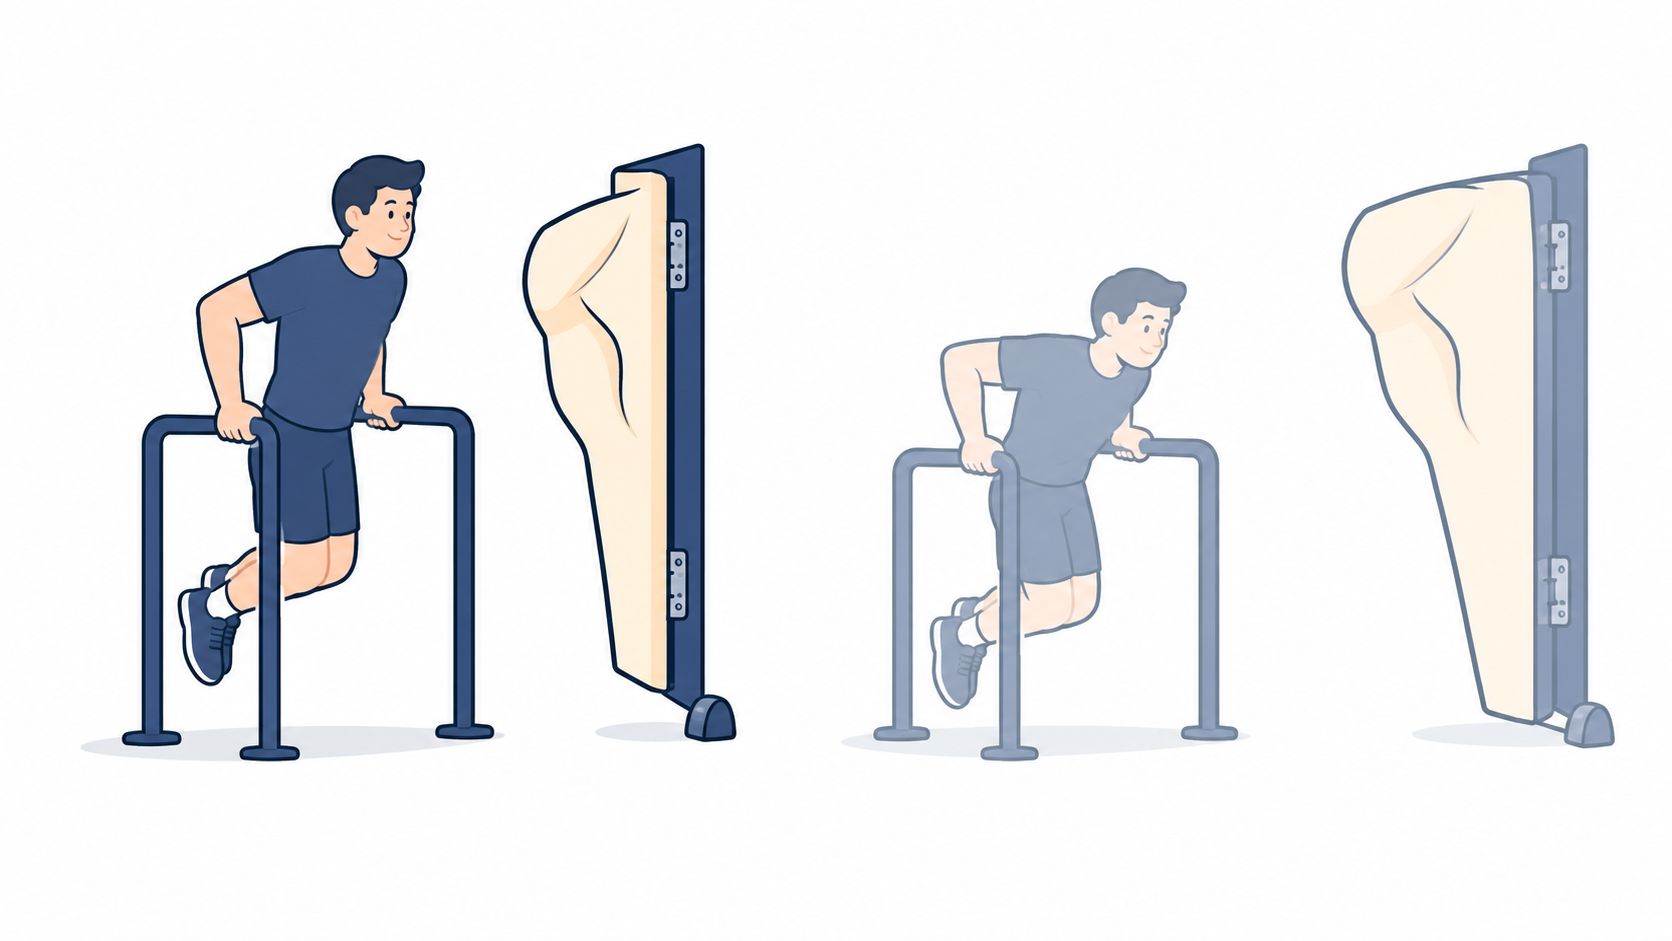
Think of your shoulder as a door on a hinge. A shallow dip opens the door partway, well short of the stop. A deep dip swings it to the edge, where the hinge and the frame take the strain, and every extra degree costs more than the one before it.
That analogy tracks what happens in the descent. Your upper arm moves back into shoulder extension, your shoulder can roll inward, and your shoulder blades can lose their stable, depressed position. Once that base slips, stress rises at the front of the shoulder and you produce force from a worse position, so the rep feels weaker exactly when the joint is least happy.
The split view below shows the top and bottom positions you need to control.
What the Motion Capture Numbers Mean
A 3D motion capture and electromyography study in the Scandinavian Journal of Medicine and Science in Sports dip analysis found peak extension reached about 101% of participants' measured maximum in bench dips, compared with about 88% for bar dips and 69% for ring dips. Read that plainly. Bench dips pushed people to, and slightly past, the extension they could reach in testing, under load, rep after rep.
Bar dips weren't gentle either at 88%. You're still working near the end of your available range, which is why depth, grip width, and fatigue matter so much. A few centimetres deeper or a wider grip can move you from controlled to hanging on passive structures at the bottom.
Those relatively favorable bar dip findings came with conditions. Testing used low repetition, bodyweight work on a V-shaped bar with minimal fatigue. Add weight, chase reps while tired, or set the grip wider, and risk can rise markedly. Your living room set to failure after three earlier sets isn't the lab condition.
A harder dip isn't a better dip if the extra difficulty comes from depth and fatigue your shoulders can't control.
Say you do two sets of eight. On Monday you're fresh, you stop at elbow level, and your shoulders stay down. On Friday you're tired, you sink deeper to steal momentum, and your shoulders roll forward at the bottom. Your notebook says eight and eight. Your shoulders experienced two different exercises.
That's why I treat depth as a variable to control, not a badge to chase. Earn range slowly, keep it identical within a training block, and let reps rise only inside a range you own. If you can't pause at the bottom without shrugging or bouncing, you're past your useful depth for that day, whatever your target says.
How to Set Up and Perform a Safe Dip
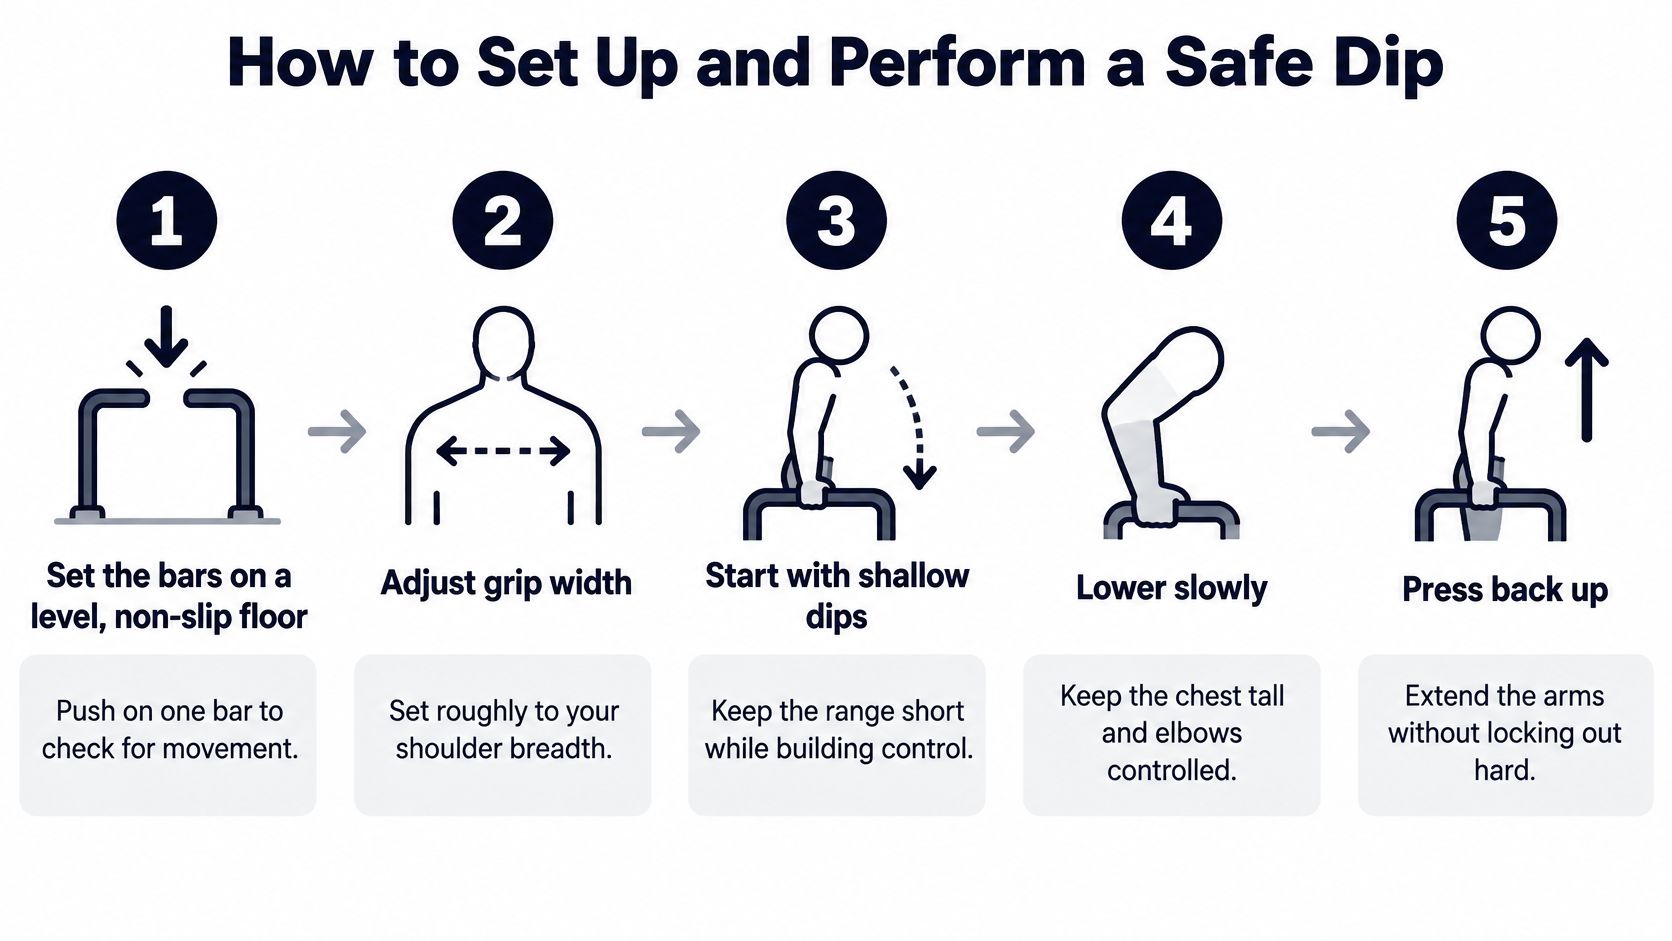
Good form on home dip bars starts before your feet leave the floor. Set the equipment, set your shoulders, then move slowly enough that you could stop at any point. Speed hides the exact faults that irritate shoulders.
The five step guide below gives you the sequence at a glance.
The Set Up and Rep, Step by Step
- Set the bars on a level, non slip floor. Push down and sideways on one bar. If it slides or rocks, move it or fix it before you mount.
- Adjust grip width to roughly your shoulder breadth. Your hands should sit under your shoulders, not forced wide to match a fixed frame.
- Start with feet on the floor or a step. Keep enough support that you can practice the path without hanging your full weight on day one.
- Grip firmly and set your shoulders down. Lift your chest, pull your shoulders away from your ears, and lock that position before you bend your elbows.
- Lower slowly for about three seconds. Descend to elbow level or the deepest pain free point, whichever comes first, keeping elbows controlled rather than flared.
- Pause briefly without bouncing. A still bottom proves you own the range. A bounce borrows momentum and spikes load.
- Press up to near lockout. Push the bars down, keep your shoulders depressed, and finish tall without snapping your elbows straight.
- Count the set only when every step held. If your shoulders shrugged, your feet kicked, or depth drifted, mark it down for what it was.
Watch the movement once through before you try to copy the tempo under load.
A Progression Ladder You Should Not Rush
- Feet supported dips: Keep toes on the floor or a step and push through your legs as needed.
- Partial range dips: Remove some support but stop well above elbow level.
- Full pain free range: Reach your target depth with a pause, across several clean sessions.
- Added load: Use a belt or vest only after full range feels boringly consistent, not merely possible once.
Each rung is a reason to consider moving on, not an instruction to do it this week. I'd rather see three identical sessions at one rung than a heroic jump followed by a week of aching. Consistency is what tells you the tissue tolerated the work.
Stop rule: Pain is data, not a test of toughness. Regress the set, don't negotiate with it.
Stop and step down a rung if you notice any of these signs.
- Sharp or pinching shoulder pain during or after the set
- Numbness or tingling in the arm, hand, or fingers
- Pain that lingers into the next day or alters how you move
You don't need to diagnose yourself on the spot. You need to stop, regress, and never push through symptoms to finish a planned number. The log entry for a stopped set is still useful, because it tells you exactly where your current ceiling sits.
When Chair Dips and Push-Ups Are the Better Choice
A chair dip is not the beginner version of a dip. That assumption sends the people with the least shoulder control into the setup that asks for the most extension. If you're starting out, returning after shoulder trouble, working under a low ceiling, or aching the day after dips, start elsewhere.
Your feet may make a bench set feel easy because your legs help lift you. Meanwhile the fixed hand position behind your back drives your shoulder further into extension as you sink. Easy in the legs, costly at the shoulder. That's a bad trade for a first progression.
Alternatives That Build Toward the Bar
- Incline push ups: Hands on a sturdy counter or table, body in one line, chest to the edge.
- Close grip push ups: Hands under your chest on the floor to load triceps without deep extension.
- Assisted dips: Feet on the floor between parallel bars, taking as much weight as you need.
- Short range dips: Full support position, small descent, clean pause, press back up.
These options fit the broader approach in this guide to building upper body strength at home, where you scale the movement instead of forcing the hardest version first. Pick the option you can perform slowly, with your shoulders down, and without holding your breath through the hard part.
Move up only after two or three sessions where the set feels clean and pain free at the same range and assistance. If your shoulder complains during the set or the next morning, go back one step without debate. Progress that survives a regression is real progress.
Symptoms that last beyond your usual recovery window, keep returning at the same rung, or include numbness deserve a clinician, not another training tweak. Getting assessed early beats guessing for months.
Choose one alternative for the next two weeks, write down the exact setup you used, and repeat it. You'll learn more from two weeks of comparable sessions than from sampling every variation you can find online.
Logging Short Dip Sets Without Overstating Results
Short sets spread through the day sound like free progress. The evidence for exercise snacks is narrower than social media suggests, and dip bars are a poor choice for careless failure training every hour. You can use mini sets well if you keep effort submaximal and log what really happened.
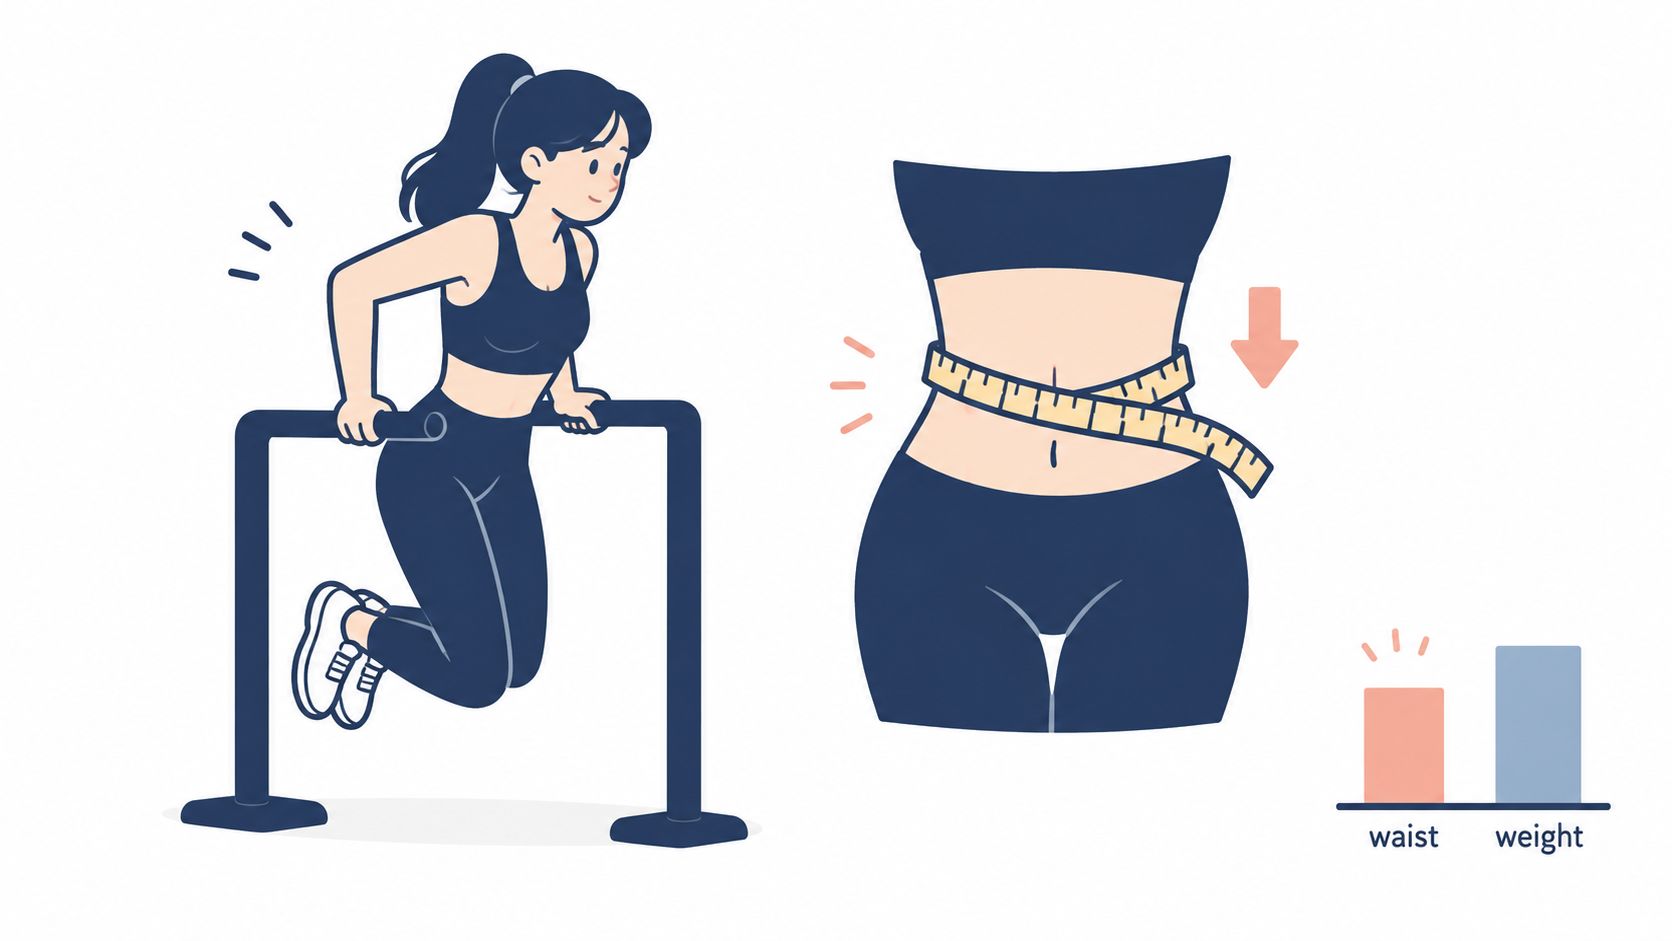
A 2025 systematic review and meta-analysis summarized in the PMC exercise snack review reported significant reductions in body-fat percentage and waist circumference, while finding no statistically significant effect on body mass or triglycerides. Another 2025 review found no clear improvements in muscular strength, body fat, blood pressure, or blood lipids across the available randomized trials. Those two readings can both be true across different protocols.
The practical reading is modest. Micro sets can help you stick with training and add useful activity, but they complement progressive, balanced work. They don't replace it, and they don't turn a pressing movement into whole body cardiovascular training.
The photo below shows the home setting where most of these short sets happen, between other tasks.
The Submaximal Snack Model
Leave two or three reps in reserve on every snack set. If you could grind out eight, do five or six and walk away fresh. Repeated high effort pressing to failure can aggravate shoulders, elbows, or sternum, especially when you revisit the bars cold between calls.
Spread one or two dip sets across a training day rather than stacking them hourly. Alternate pressing days with pulling work like rows and with lower body work like squats or glute bridges, and keep rest days in the week. Local muscle endurance in your chest, shoulders, and triceps can improve from this pattern. That isn't the same claim as improved blood pressure or blood lipids.
A simple bodyweight workout journal works if it captures context, not just reps. I would log these fields for every set, however short.
| Log field | Example entry | Why it matters |
|---|---|---|
| Date and time | Tuesday, 10:30 and 15:00 | Shows the spacing of snacks across the day |
| Reps and reps in reserve | 6 reps, 3 in reserve | Separates submaximal sets from failure sets |
| Setup | Parallel bars, 55 cm width | The same reps on different setups load the shoulder differently |
| Range | Elbow level, pain-free | Range is a progression variable, not just a count |
| Assistance | Feet on the floor | Shows real progress toward unassisted dips |
| Pain or symptoms | None, 0 out of 10 | Triggers a stop or a regression |
Ten reps on a bench and ten on parallel bars aren't the same dose. Without setup and range beside the number, you can't tell whether you got stronger or just found an easier, or harsher, way to reach ten. Log the variables and the rep count starts to mean something.
Confirm Your Setup and Start This Week
Your first week should feel manageable. You're checking fit, range, and recovery, not chasing a personal best between the sofa and kitchen counter. Keep the plan simple enough to repeat.
- Choose one setup and confirm it. Check that the bars stay stable, your frame clears them, and the grip feels comfortable before your first rep.
- Do one or two submaximal snacks per training day. Start with the easiest version you can perform cleanly, using foot support or a shorter range if needed.
- Log your reps and keep the details straight. Note your setup, range, and assistance separately, so a rep count does not disguise a change in difficulty.
Increase the load or range only when the set feels easy and your technique stays consistent. If you're new to bodyweight training, this beginner's bodyweight training overview can help you fit dip sets into a weekly rhythm.
After fourteen days, review how the sets went. If your shoulders felt fine and your range stayed consistent, add one rep or move up one rung, not both. If symptoms appeared, step back a rung and use an easier alternative until they settle. Keep reps, setup, and range in view: the same count can represent a different shoulder load when those conditions change.
Turn short home sets into a visible record with SuperStrong, an iPhone app that displays logged sets as tiles on a shared wall for up to four friends. Log reps in seconds between tasks, follow a three-training-day weekly rhythm, and let the growing wall show your group what got done.