Elbow on Knee: Form, Progressions, and Smart Programming
 14 min
You're halfway through a bicycle crunch when the instructor calls, “Elbow to knee!” You speed up, pull your head forward, and chase the kneecap with your elbow. By the end of the set, your neck feels the work more than your abdomen.
The phrase elbow on knee sounds like one exercise, but it can describe several very different positions. It might mean resting your elbow on your knee, rotating through a bicycle crunch, or using a standing mobility drill. The contact point looks similar, yet the purpose, pace, balance, and spinal demand change completely.
Table of Contents
- What Elbow on Knee Actually Means
- Setting Up the Position and the Movement
- Common Form Mistakes and How to Spot Them
- Progressions and Regressions for Any Level
- Programming It Into a Weekly Routine
- When to Skip It and Choose Another Move
- Putting It All Together This Week
What Elbow on Knee Actually Means
The first meaning is a resting posture. You might sit cross-legged and place one elbow on the opposite knee while leaning forward or relaxing into a stretch. In this version, the elbow may be supported without effort. You aren't trying to create a powerful contraction or move quickly.
The second meaning is the familiar bicycle crunch cue. Your right elbow travels toward your left knee while your right leg extends, then you switch sides. The elbow doesn't need to touch the kneecap. The useful action comes from rotating the ribcage and lifting the shoulder blade while the trunk stays controlled.
The third meaning is a mobility or standing balance variation. You stand tall, lift one knee, and draw the opposite elbow down toward it. That version challenges balance, hip movement, and coordination without placing your back on the floor.
These versions share an elbow-to-knee relationship, but they don't share the same intent. Laboratory biomechanics also treats the elbow and knee as hinge joints across specific flexion ranges, not as one universal “elbow on knee” movement. One study tested elbow motion from full extension to 125 degrees of flexion and knee motion to 110 degrees of flexion, showing that torque changes with the joint and direction of movement. At midrange angles, torque at both joints fell to approximately 40–50% of isometric values at a movement speed of 300 degrees per second in the isokinetic biomechanics study.
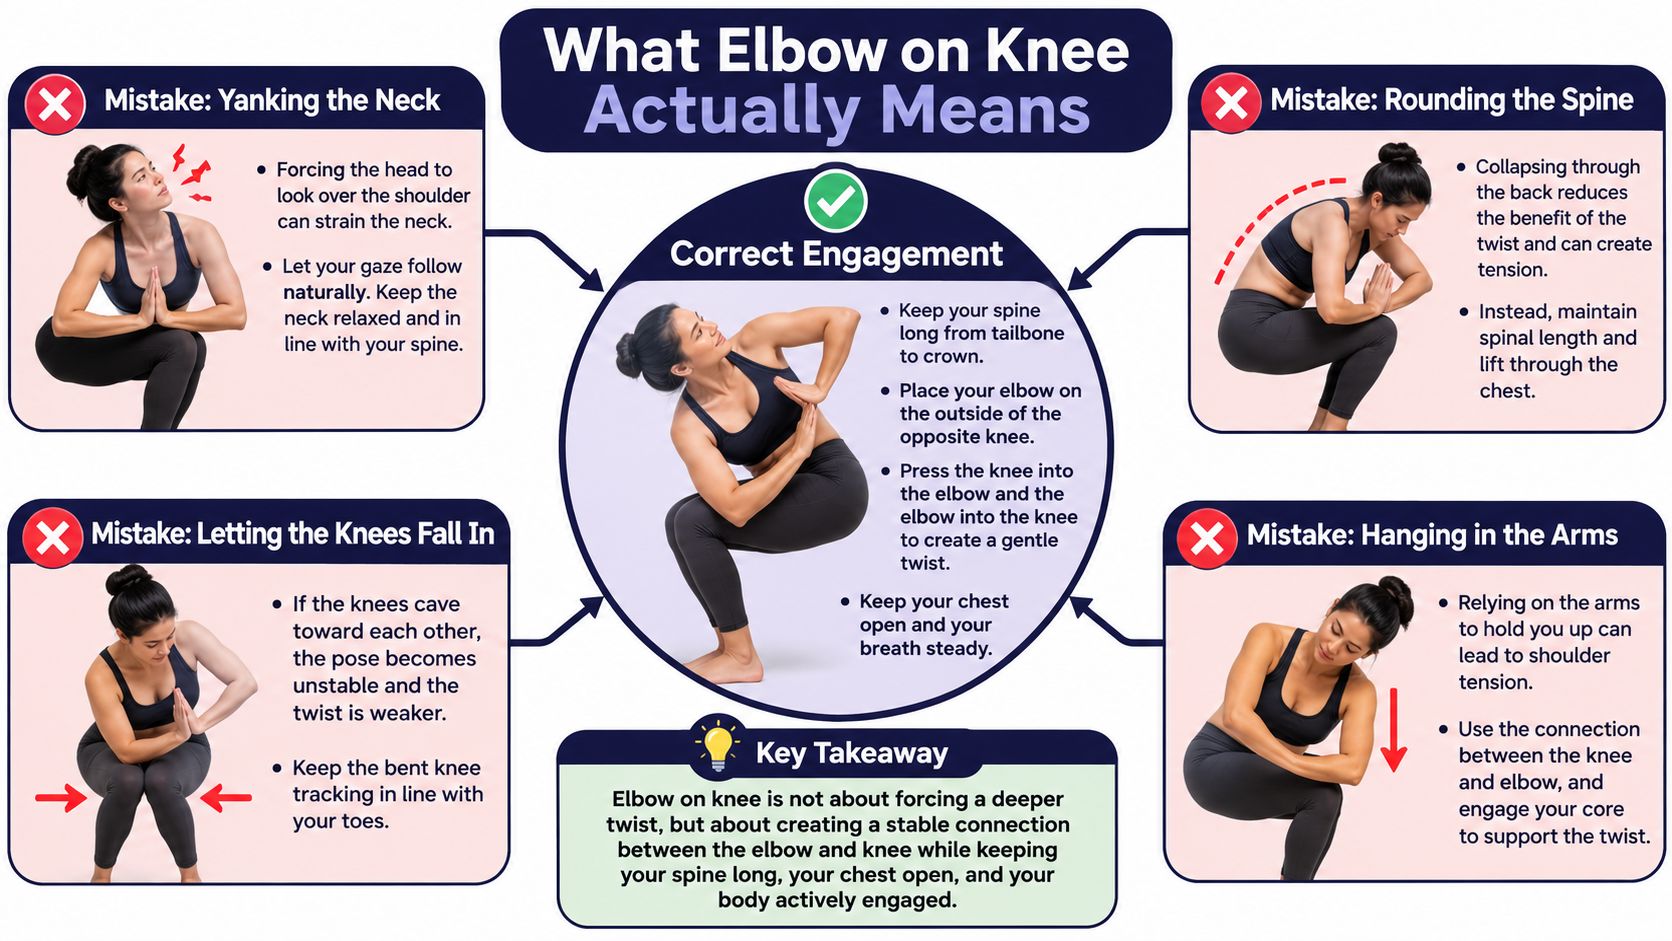
The practical lesson is simple: name the version before you perform it. A supported resting posture needs comfort. A bicycle crunch needs ribcage rotation. A standing variation needs balance and smooth hip movement.
Setting Up the Position and the Movement
Lie on a mat with your knees bent and your feet lifted. Bring your knees over your hips so your shins are approximately parallel to the floor, creating roughly 90-degree angles at the knees. Place your hands lightly behind your ears, keep your elbows open, and avoid clasping your fingers behind your head.
Before moving, gently tilt your pelvis so your lower back makes contact with the mat. Think of bringing the front of your ribcage slightly downward rather than forcing your spine flat with tension. This position gives your trunk a stable starting point and stops the legs from pulling your lower back into an arch.
Your right elbow should travel toward the outside of your left thigh as your left leg extends. Your left shoulder blade lifts from the mat as the ribcage rotates. The elbow is a destination cue, not the engine. If you reach aggressively with the arm, you'll lose the rotation that makes the movement useful.
How far the elbow should travel
Aim toward the outer thigh, not the kneecap. A small gap is perfectly acceptable. Your shoulder blade can lift while your lower back remains connected to the mat and your neck stays long.
Exhale as you rotate. Inhale as you return through the center and prepare to switch. Keep the movement slow enough to feel the side of your trunk shorten. If the legs kick, the elbows chase the knees, or your breathing becomes rushed, the tempo has already become too fast.
For a related trunk rotation pattern, compare the setup with this guide to bent-leg body twists. The same principle applies here: control the ribcage first, then let the limbs follow.
A useful rhythm is one controlled rotation per exhale, followed by a quiet return. Your gaze can stay toward the knees, with the chin slightly tucked. You shouldn't feel as if you're trying to fold your face into your chest.
Common Form Mistakes and How to Spot Them
The fastest way to improve is to identify what changes first when your form breaks. Neck tension, swinging legs, and an arched lower back usually appear before you notice that the abdominal rotation has disappeared.
| Common Mistake | Visible Sign | Why It Leaks Tension | Quick Fix |
|---|---|---|---|
| Pulling the head forward | Chin juts up or fingers press into the skull | The hands take over instead of the ribcage rotating | Treat your hands as light pillows and widen the elbows |
| Driving the elbow into the kneecap | Upper back rounds and the elbow reaches aggressively | The movement becomes a forward curl and hip flexor pull | Reach toward the outer thigh and leave a small gap |
| Dropping or kicking the extended leg | The leg swings far below or above the other shin | Momentum replaces trunk control and can tug on the hips or lower back | Hover the leg at a consistent height |
| Holding the breath | Face tightens and every repetition becomes jerky | You lose a steady rhythm and make it harder to control the return | Exhale through each rotation and inhale as you switch |
The head-pulling error is easy to miss because the hands are already near the skull. Keep only your fingertips in contact if that helps you remember that the neck isn't a handle. Your shoulder blade should lift because the ribs rotate, not because your arms drag the head forward.
The kneecap mistake often comes from treating “elbow to knee” as a literal collision. Contact isn't the target. The target is a controlled cross-body rotation, and the elbow may stop several inches away while the trunk works effectively.
Your extended leg should also remain quiet. If it drops too low, the hip flexors and lower back may dominate. If it rises too high, you reduce the lever challenge and may start using the leg to create momentum. The right height is the one you can hold without your pelvis tipping.
If you want another way to practice side-body control, use the slower setup in this side crunch guide. The same diagnostic rule applies: if your neck burns first, reduce the reach and slow the rotation.
Progressions and Regressions for Any Level
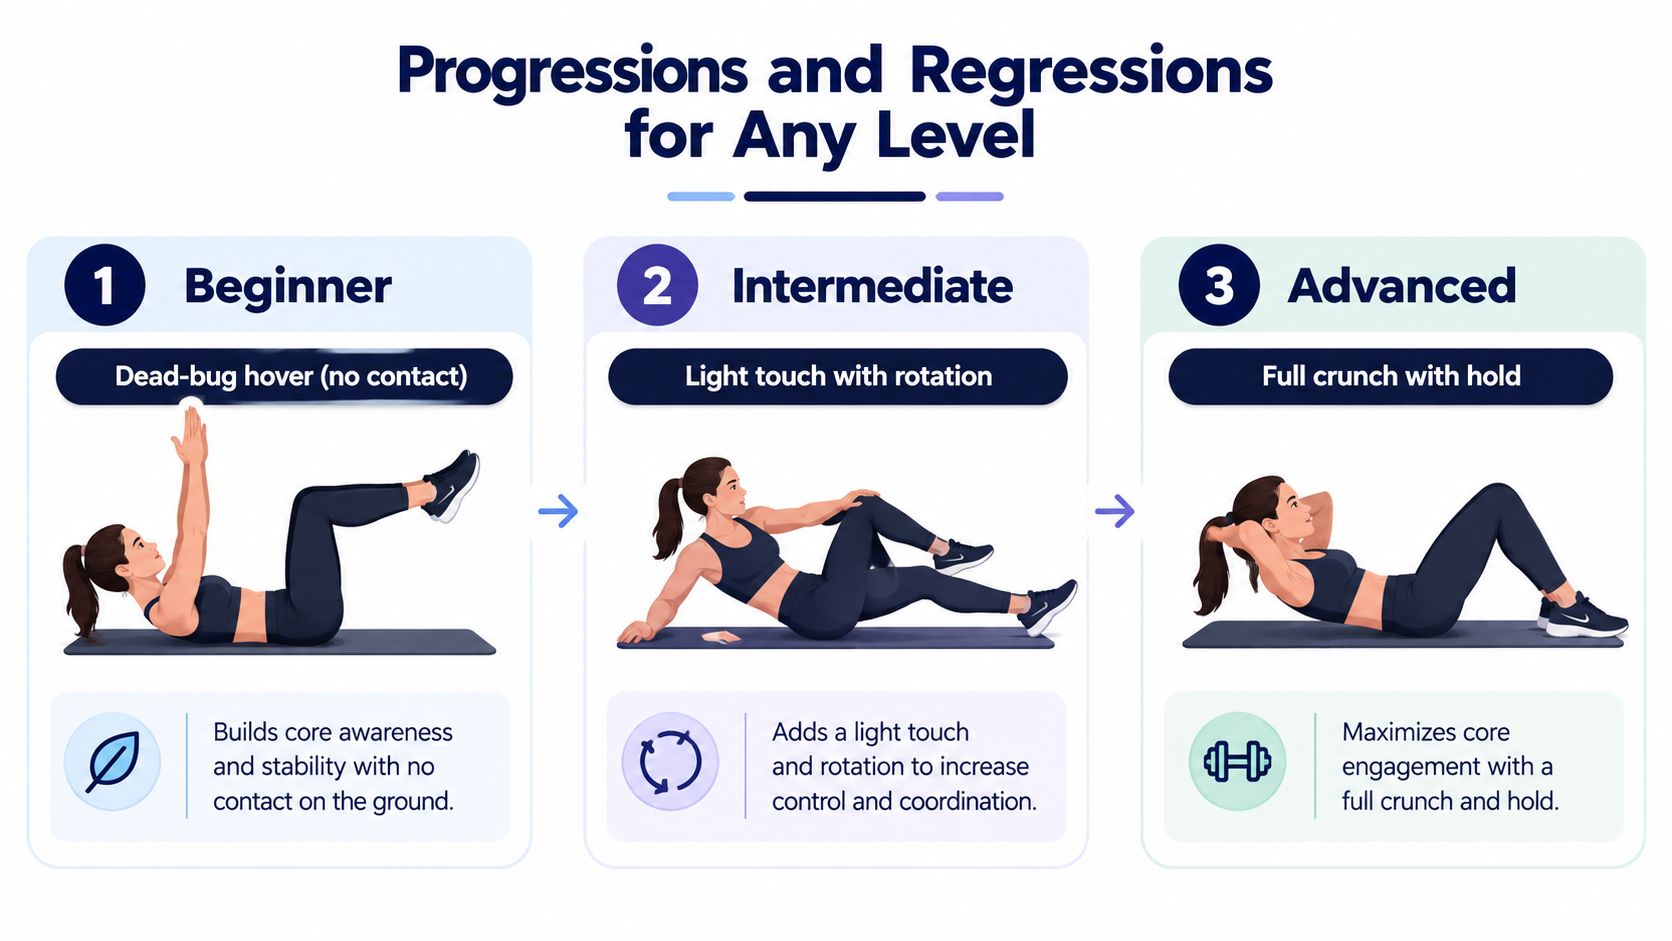
Choose the version that lets you keep your neck relaxed, your breathing unbroken, and your pelvis steady. Difficulty should come from the lever length, rotation demand, pause, or return speed, not from rushing toward the knee.
Beginner level
Start with a dead-bug-style hover. Bring one elbow toward the opposite knee without touching either one, while the other leg extends. Pause for one second at the top, return slowly, and alternate sides.
Use two sets of ten slow repetitions. Rest long enough to reset your breathing and check that the lower back is still supported. This version reduces the urge to chase contact and teaches you to coordinate the trunk with the moving leg.
Intermediate level
Move to the standard bicycle crunch when the hover feels stable. Keep only light fingertip support behind the head and complete three sets of twelve to fifteen repetitions per side, resting 45 seconds between sets.
Don't interpret “intermediate” as “fast.” The main progression is the ability to rotate farther without pulling on the neck or letting the extended leg swing. If the last repetitions become noisy and rushed, stop the set rather than borrowing momentum.
Advanced level
For a harder variation, add a two-second hold near the elbow-to-knee position and take three seconds to return to the center. Complete three sets of eight repetitions per side, with 60 seconds of rest.
This slower return increases the control requirement. It also makes poor positioning obvious. You should feel capable of stopping the leg and ribcage at any point instead of falling through the repetition.
Progression rule: Move up only when every repetition feels stable and your breathing rhythm stays unbroken.
Drop down a level if you develop neck pain, hip flexor cramping, or a clear loss of rotation quality. Pain, rather than ordinary muscular effort, is a reason to stop and reassess. The accompanying core progression visual can help you match the variation to your current control.
Use the demonstration below as a visual reference, but keep your own tempo slower if needed.
Programming It Into a Weekly Routine
You don't need to perform bicycle crunches every day to make them useful. A simple three-days-a-week rhythm gives you repeated practice while leaving rest days for recovery and for noticing whether your technique is improving.
Attach the movement to an existing strength session or a short core block. Choose one tier and complete two to three sets per session. Keep the exercise in the same place in your routine for a few weeks so that changes in control are easier to recognize.
Micro-workouts can be useful when they contain a clear dose rather than a random burst of movement. A 2025 systematic review and meta-analysis included 11 randomized trials with 414 sedentary or inactive adults using exercise bouts of five minutes or less, performed at least twice daily. The review reported improvements in cardiorespiratory fitness and muscular endurance, with more than 90% session completion and roughly 83% adherence, while findings were less convincing for blood pressure, body composition, and broader cardiometabolic outcomes in this BMJ Sports Medicine summary. That evidence supports short, deliberate sessions, not the idea that every brief movement automatically provides a meaningful training stimulus.
What to record
Log only four fields after each set:
- Tier: Beginner, intermediate, or advanced.
- Reps per side: Record completed, controlled repetitions.
- Rest: Note the rest period in seconds.
- Quality score: Give the set a score from 1 to 5, based on neck comfort, breathing, pelvis control, and smooth rotation.
The quality score turns “that felt bad” into something you can act on. If the score falls across the week, reduce the tier or sets. If the score remains high and the breathing stays smooth, progress gradually.
| Day | Tier | Sets x Reps | Rest | Quality (1-5) |
|---|---|---|---|---|
| Monday | Beginner | 2 x 10 per side | 45 seconds | 4 |
| Tuesday | Rest | None | None | None |
| Wednesday | Beginner | 2 x 10 per side | 45 seconds | 4 |
| Thursday | Rest | None | None | None |
| Friday | Beginner | 2 x 10 per side | 45 seconds | 5 |
| Saturday | Rest | None | None | None |
| Sunday | Rest | None | None | None |
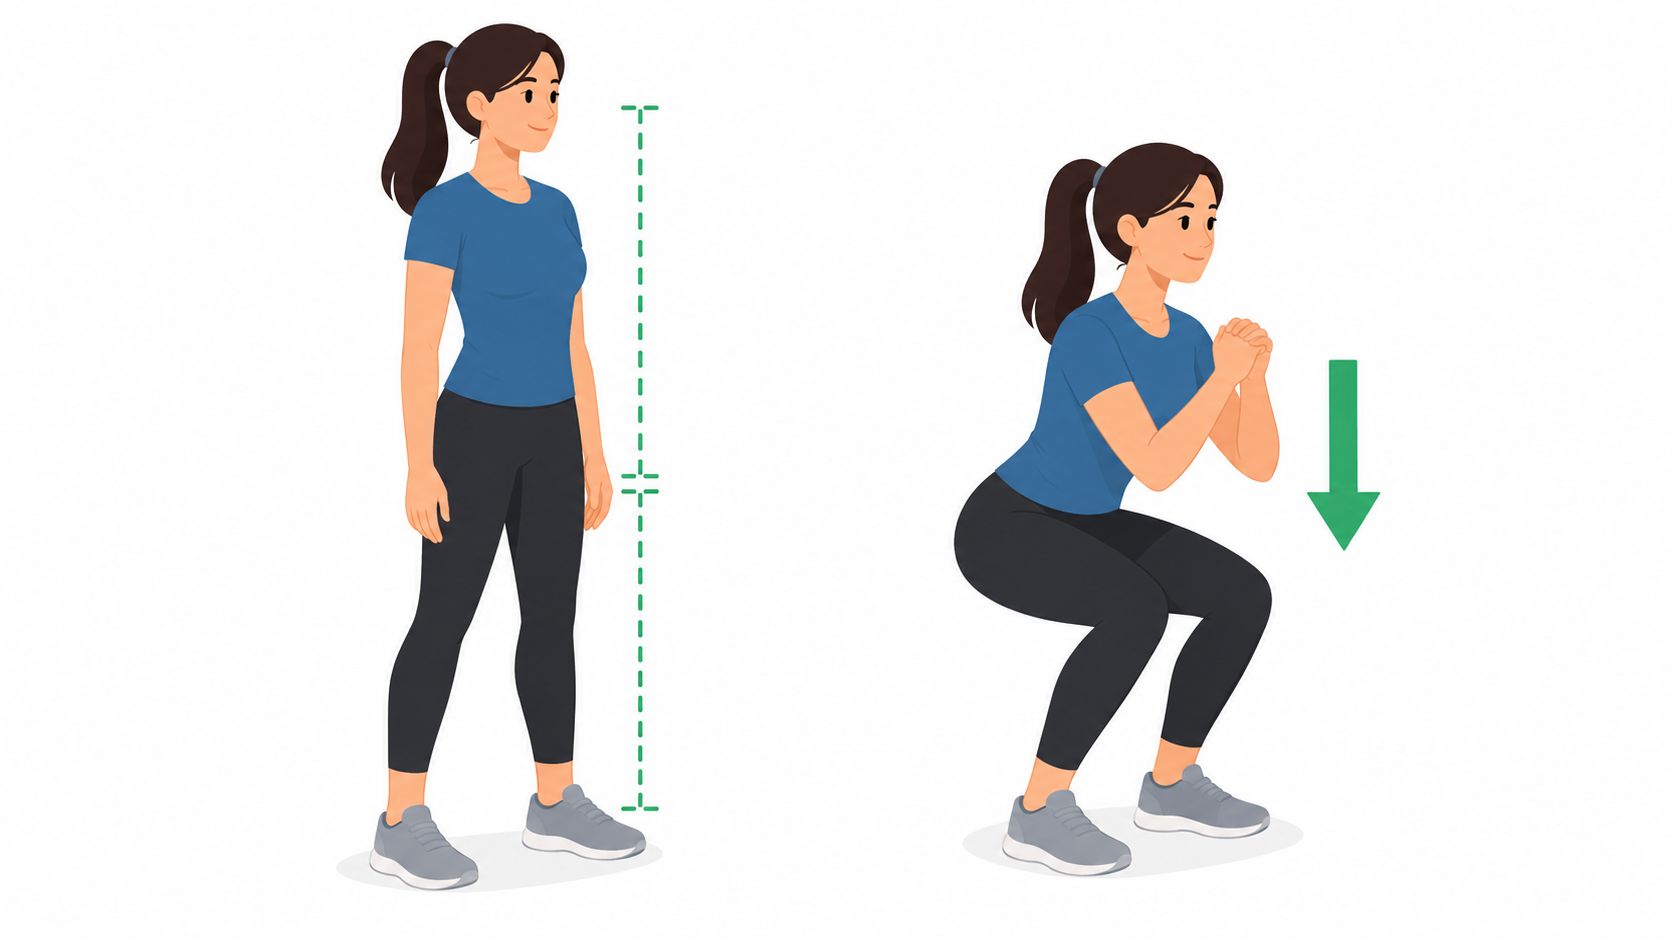
Pair the movement with another clear bodyweight drill instead of adding endless crunches. A simple at-home, no-equipment workout can give you options such as bridges, bird dogs, squats, or push-ups while keeping the total session manageable.
When to Skip It and Choose Another Move
Elbow-to-knee contact doesn't automatically mean better abdominal training. Many beginners sacrifice rotation quality just to make the elbow touch the knee, turning a controlled trunk exercise into a fast sequence of neck pulling, hip flexor effort, and leg swinging.
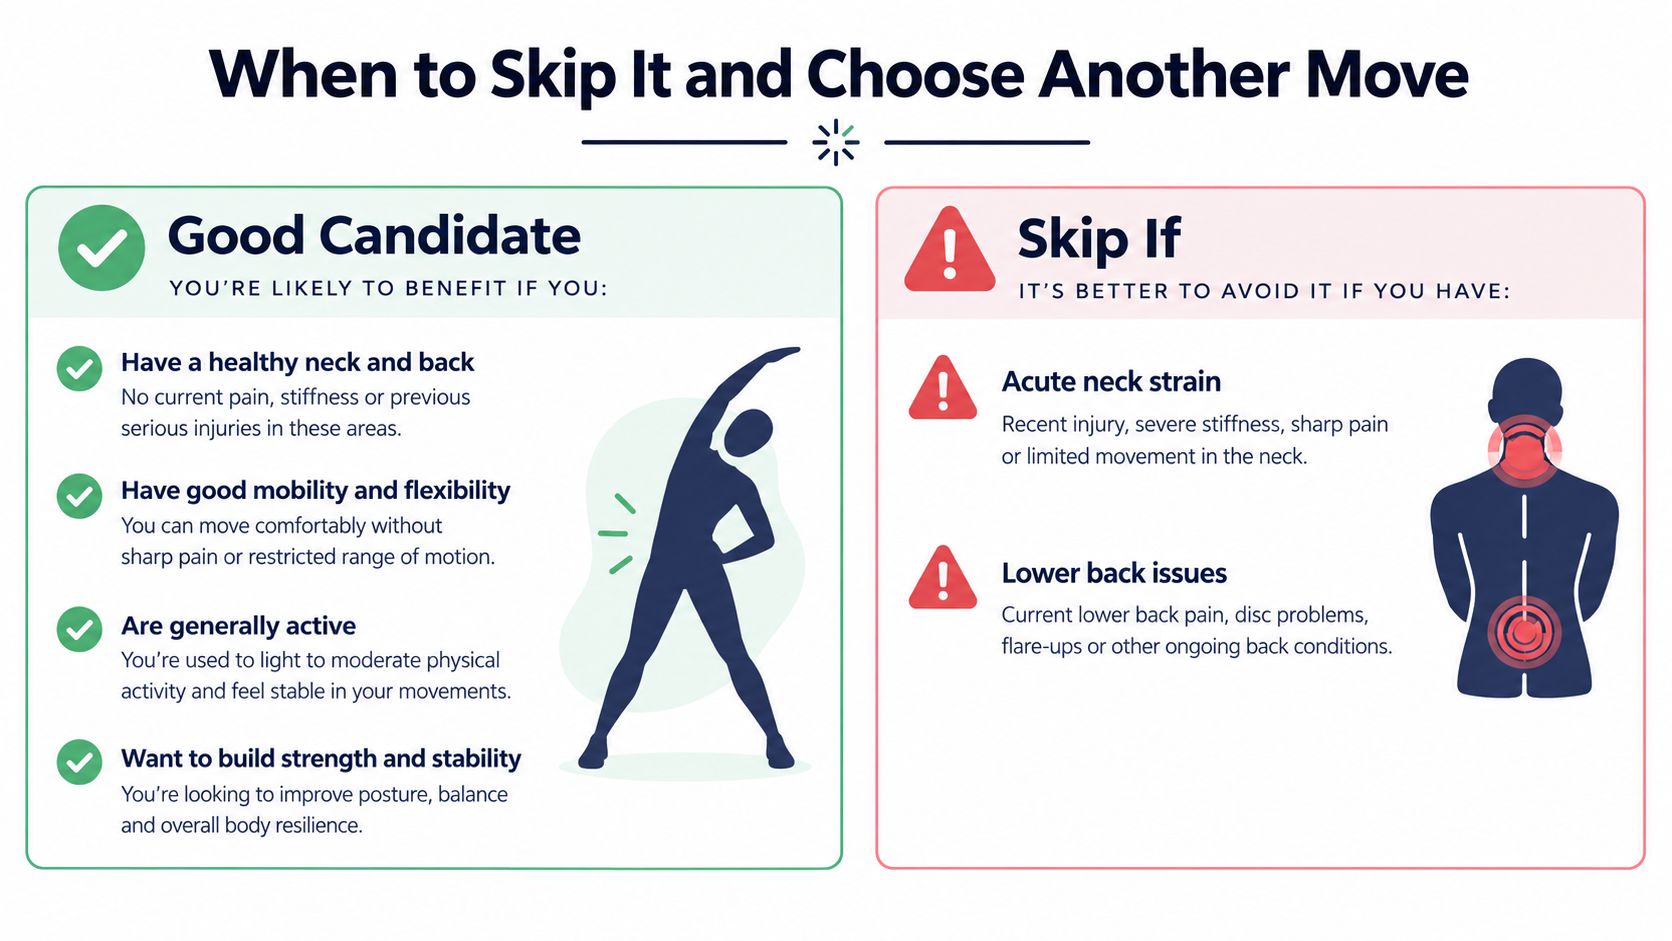
Skip the movement for now if you have an acute neck strain, lower-back sensitivity that worsens with rotation, or a condition where your clinician has advised against this position. Late-stage pregnancy also calls for individual guidance rather than copying a floor-based crunch. If your speed has crept up and you can't control the return, the problem is the setup, not a lack of toughness.
The elbow and knee are contact landmarks, not proof of exercise quality. Research on elbow strikes shows how quickly force and injury risk can change with impact area, angle, body mass, and individual differences. In one laboratory study of 20 healthy adults, median elbow-blow force was approximately 922 N for men and roughly 500–550 N for women, while the study also noted that peak values and target anatomy can change risk substantially in the force study indexed by PubMed. Although that research concerns strikes rather than crunches, it reinforces a broader coaching point: a contact point doesn't tell you whether a movement is safe or effective.
Try one of these clearer alternatives:
- Standing cross-body reach: Lift one knee and bring the opposite hand or elbow toward it without rushing. Keep your torso tall and use a wall for balance if necessary.
- Contralateral march on your back: Keep your spine supported while one arm and the opposite leg move away from the center. This trains coordination without asking for a deep rotation.
- Side plank with a reach-through: From a modified or full side plank, rotate the upper arm under the torso and return. Reduce the range if your shoulder or lower back can't stay controlled.
Use this floor-level decision rule: if your fingertips are yanking your head forward, your ribs are flaring, or your hip flexor is doing most of the work, swap the exercise instead of grinding through the set.
Putting It All Together This Week
Start your first session with a 60-second self-check. Lie on your back, place your hands lightly behind your head, press your lower back toward the mat, and perform a slow bicycle crunch. Check that the right elbow tracks toward the left outer thigh, the left leg extends without swinging, and your neck remains quiet.
Use two non-consecutive sessions this week. In each session, complete three sets of 8 to 12 slow repetitions per side, rest 45 seconds between sets, and pause for one breath at the rotated position. Choose the beginner hover if you're learning the pattern, the standard bicycle crunch if you can already control the pelvis, or the advanced hold only when the return stays smooth.
Use quality to decide what happens next. After five good sets, consider moving up one tier or adding a small amount of control. After two sloppy sets where the neck or hip flexors take over, move down and reduce the lever length.
Write down your reps, tempo, quality score, and any neck or lower-back sensation. This turns a vague impression into a trend you can review. Pair the movement with a hinge, such as a bridge, and a carry or carry-style hold when possible, so your core work includes more than repeated spinal flexion.
Your target isn't elbow contact. It's repeatable control from the ribcage to the pelvis.
SuperStrong organizes short, at-home bodyweight sets into a shared visual wall, helping you record movements such as bird dogs, bridges, squats, and push-ups across a simple three-days-a-week rhythm. If you want a clearer way to make small sessions visible and share them with up to four friends, visit SuperStrong and start building your wall.